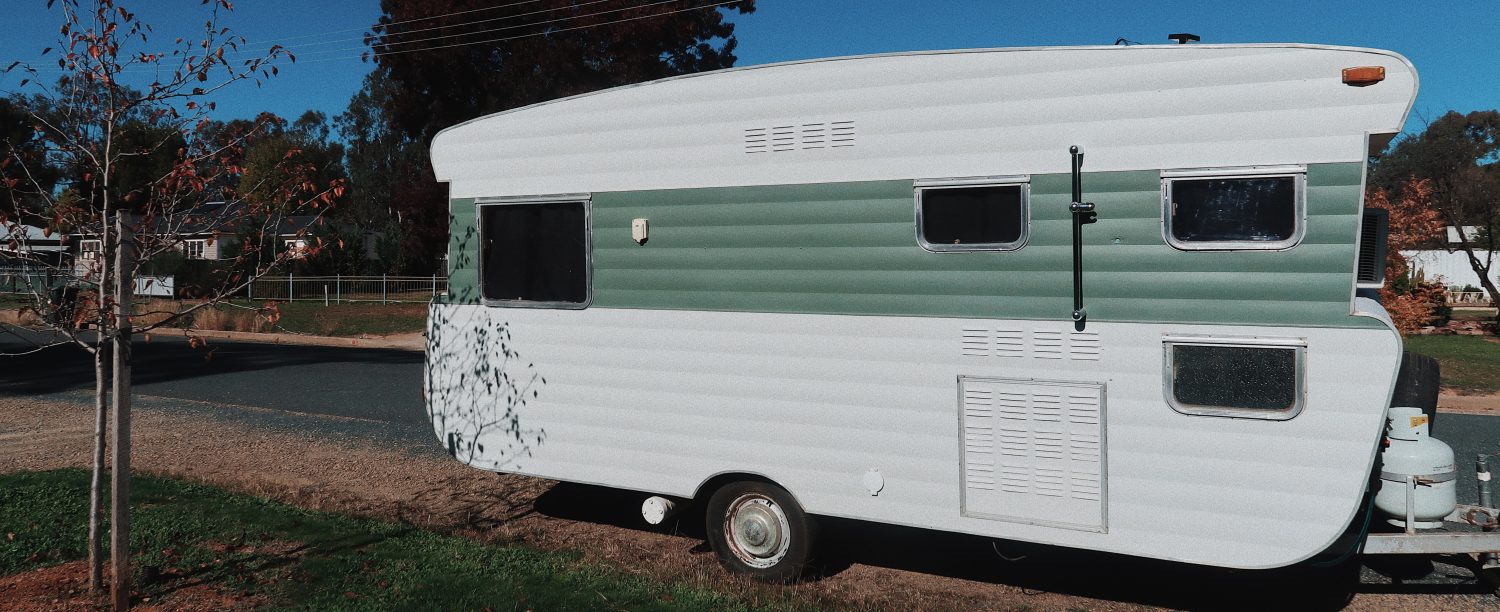
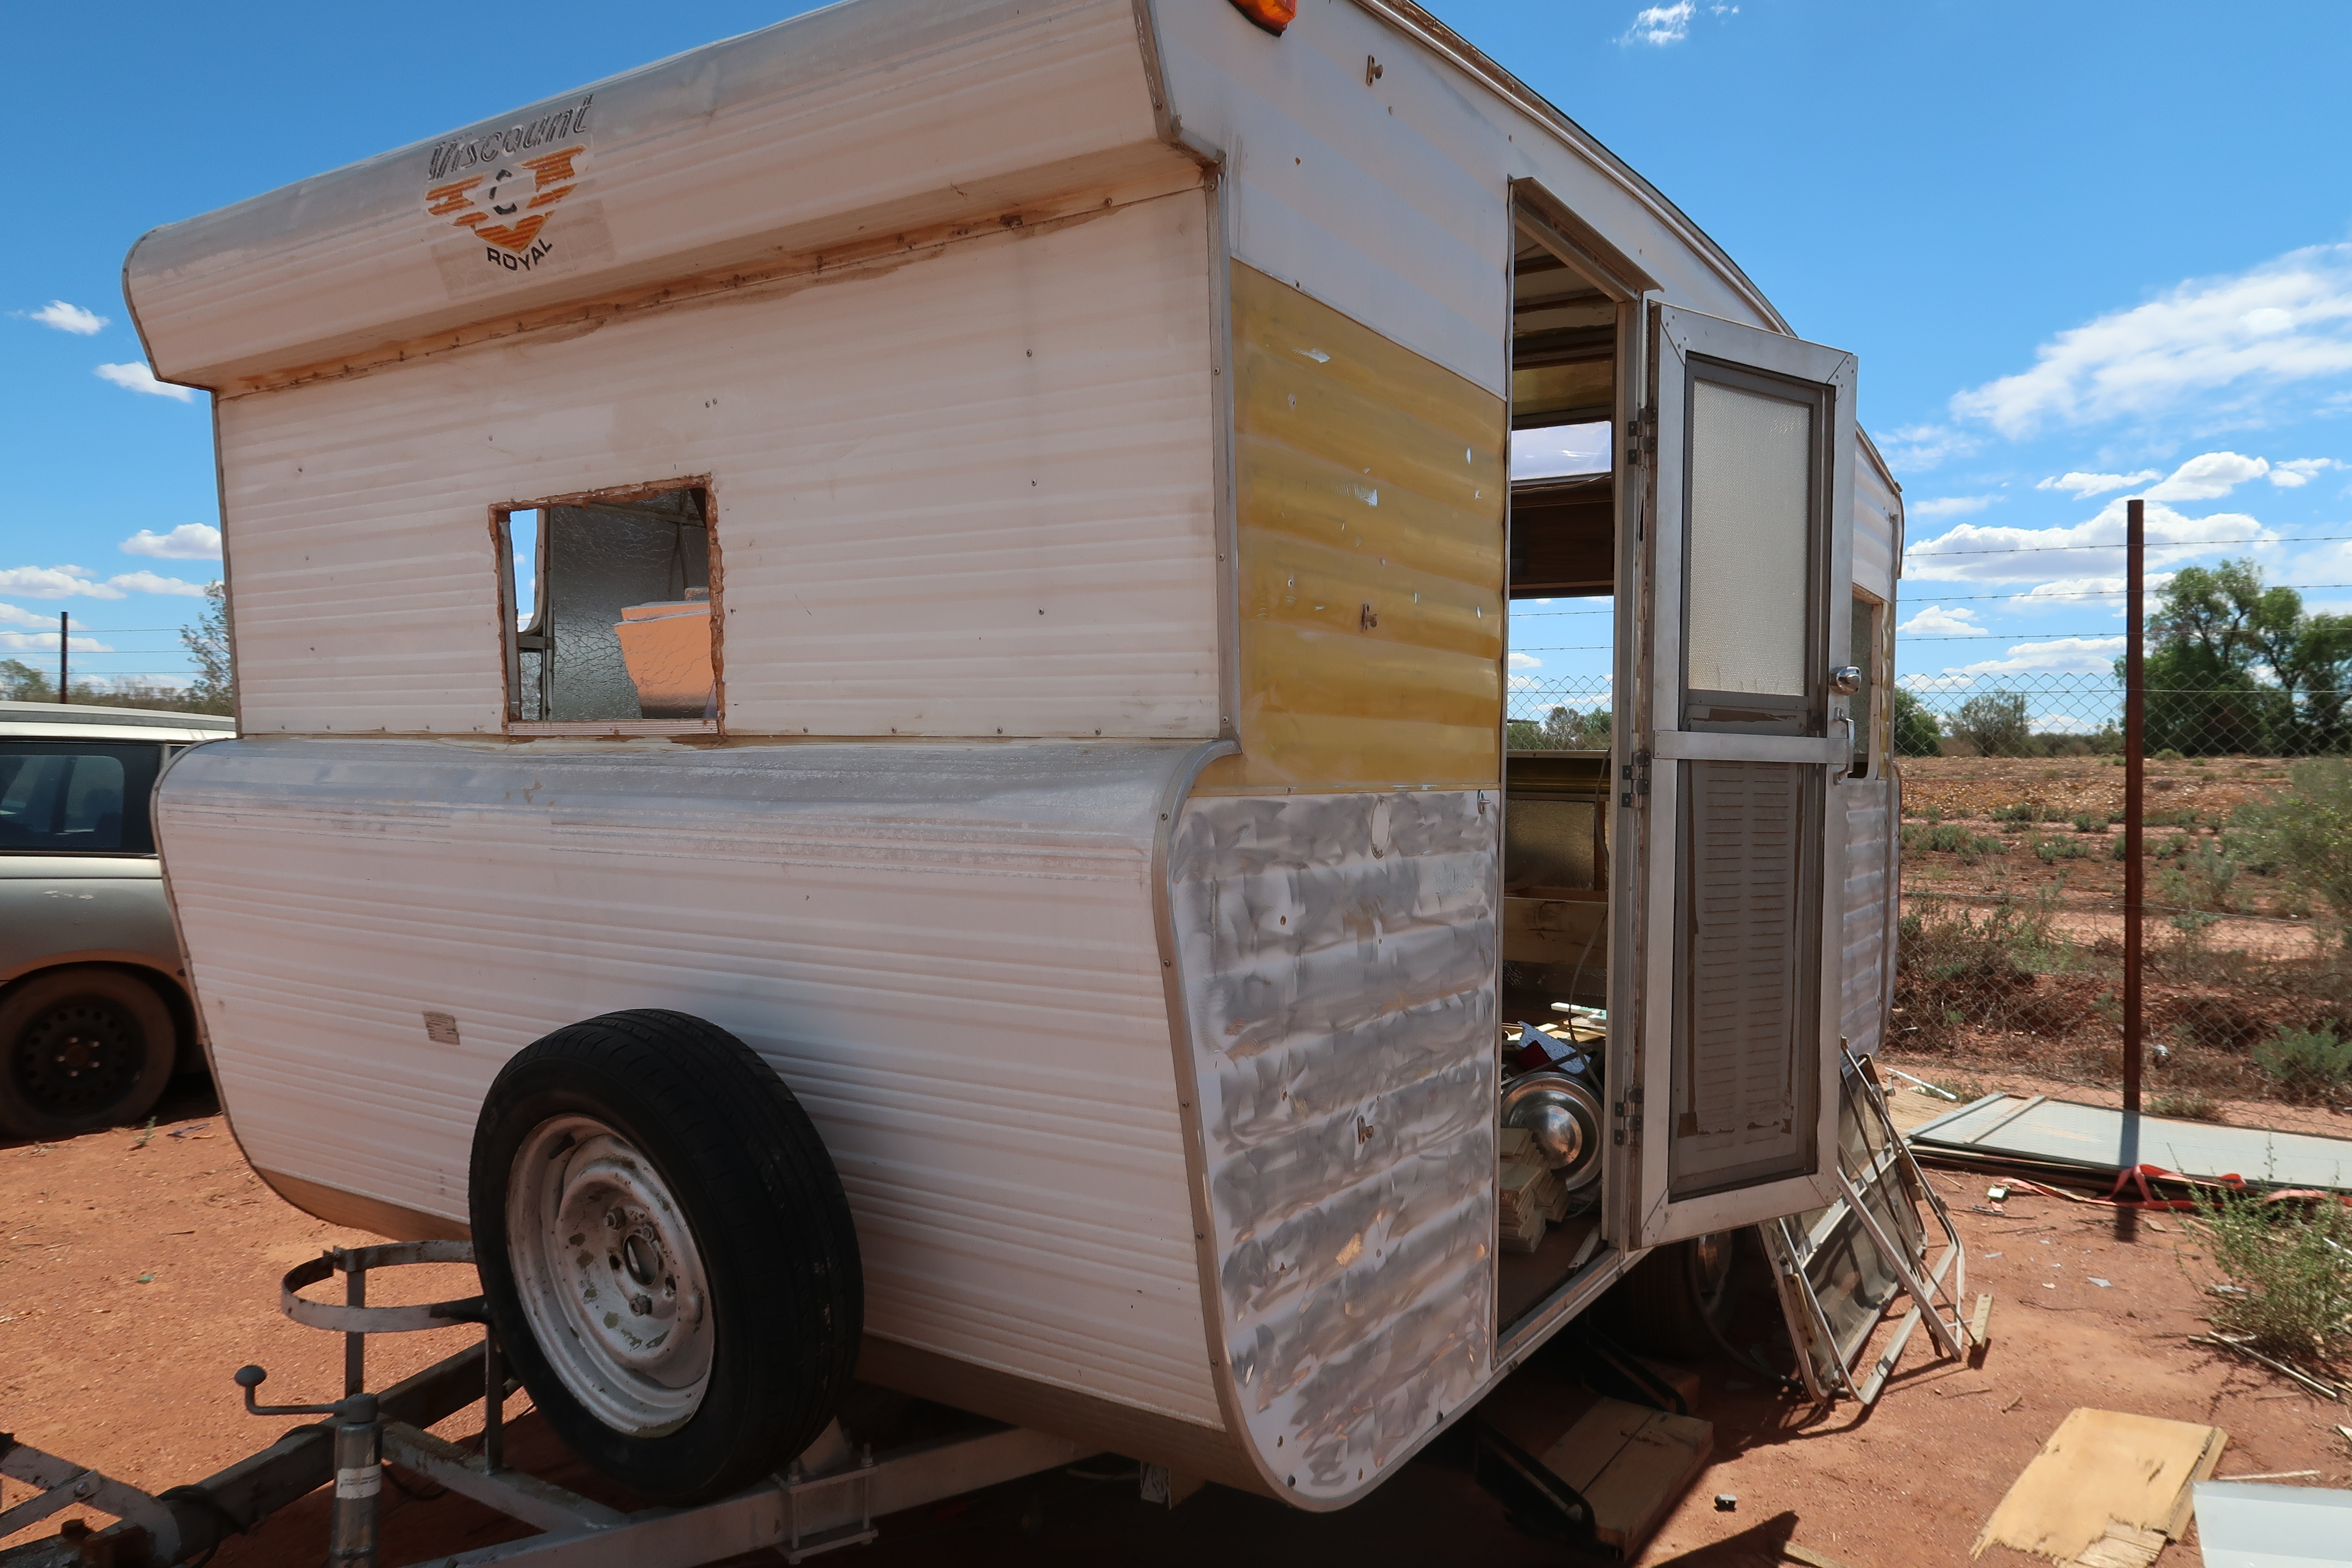
MEET TWIGGY! Our cozy oasis and our new home on wheels. She’s a bit rusty but we couldn’t love her more. She’s a 1978 Viscount Royale Caravan (these caravans were very popular in the 80’s and 90’s in Australia). We bought the van off of friends of ours for a fairly cheap price. We had to strip the van and start from the very begining and even though it got frustrating at times, Sam and I are so proud of how our project turned out. Look for yourself!
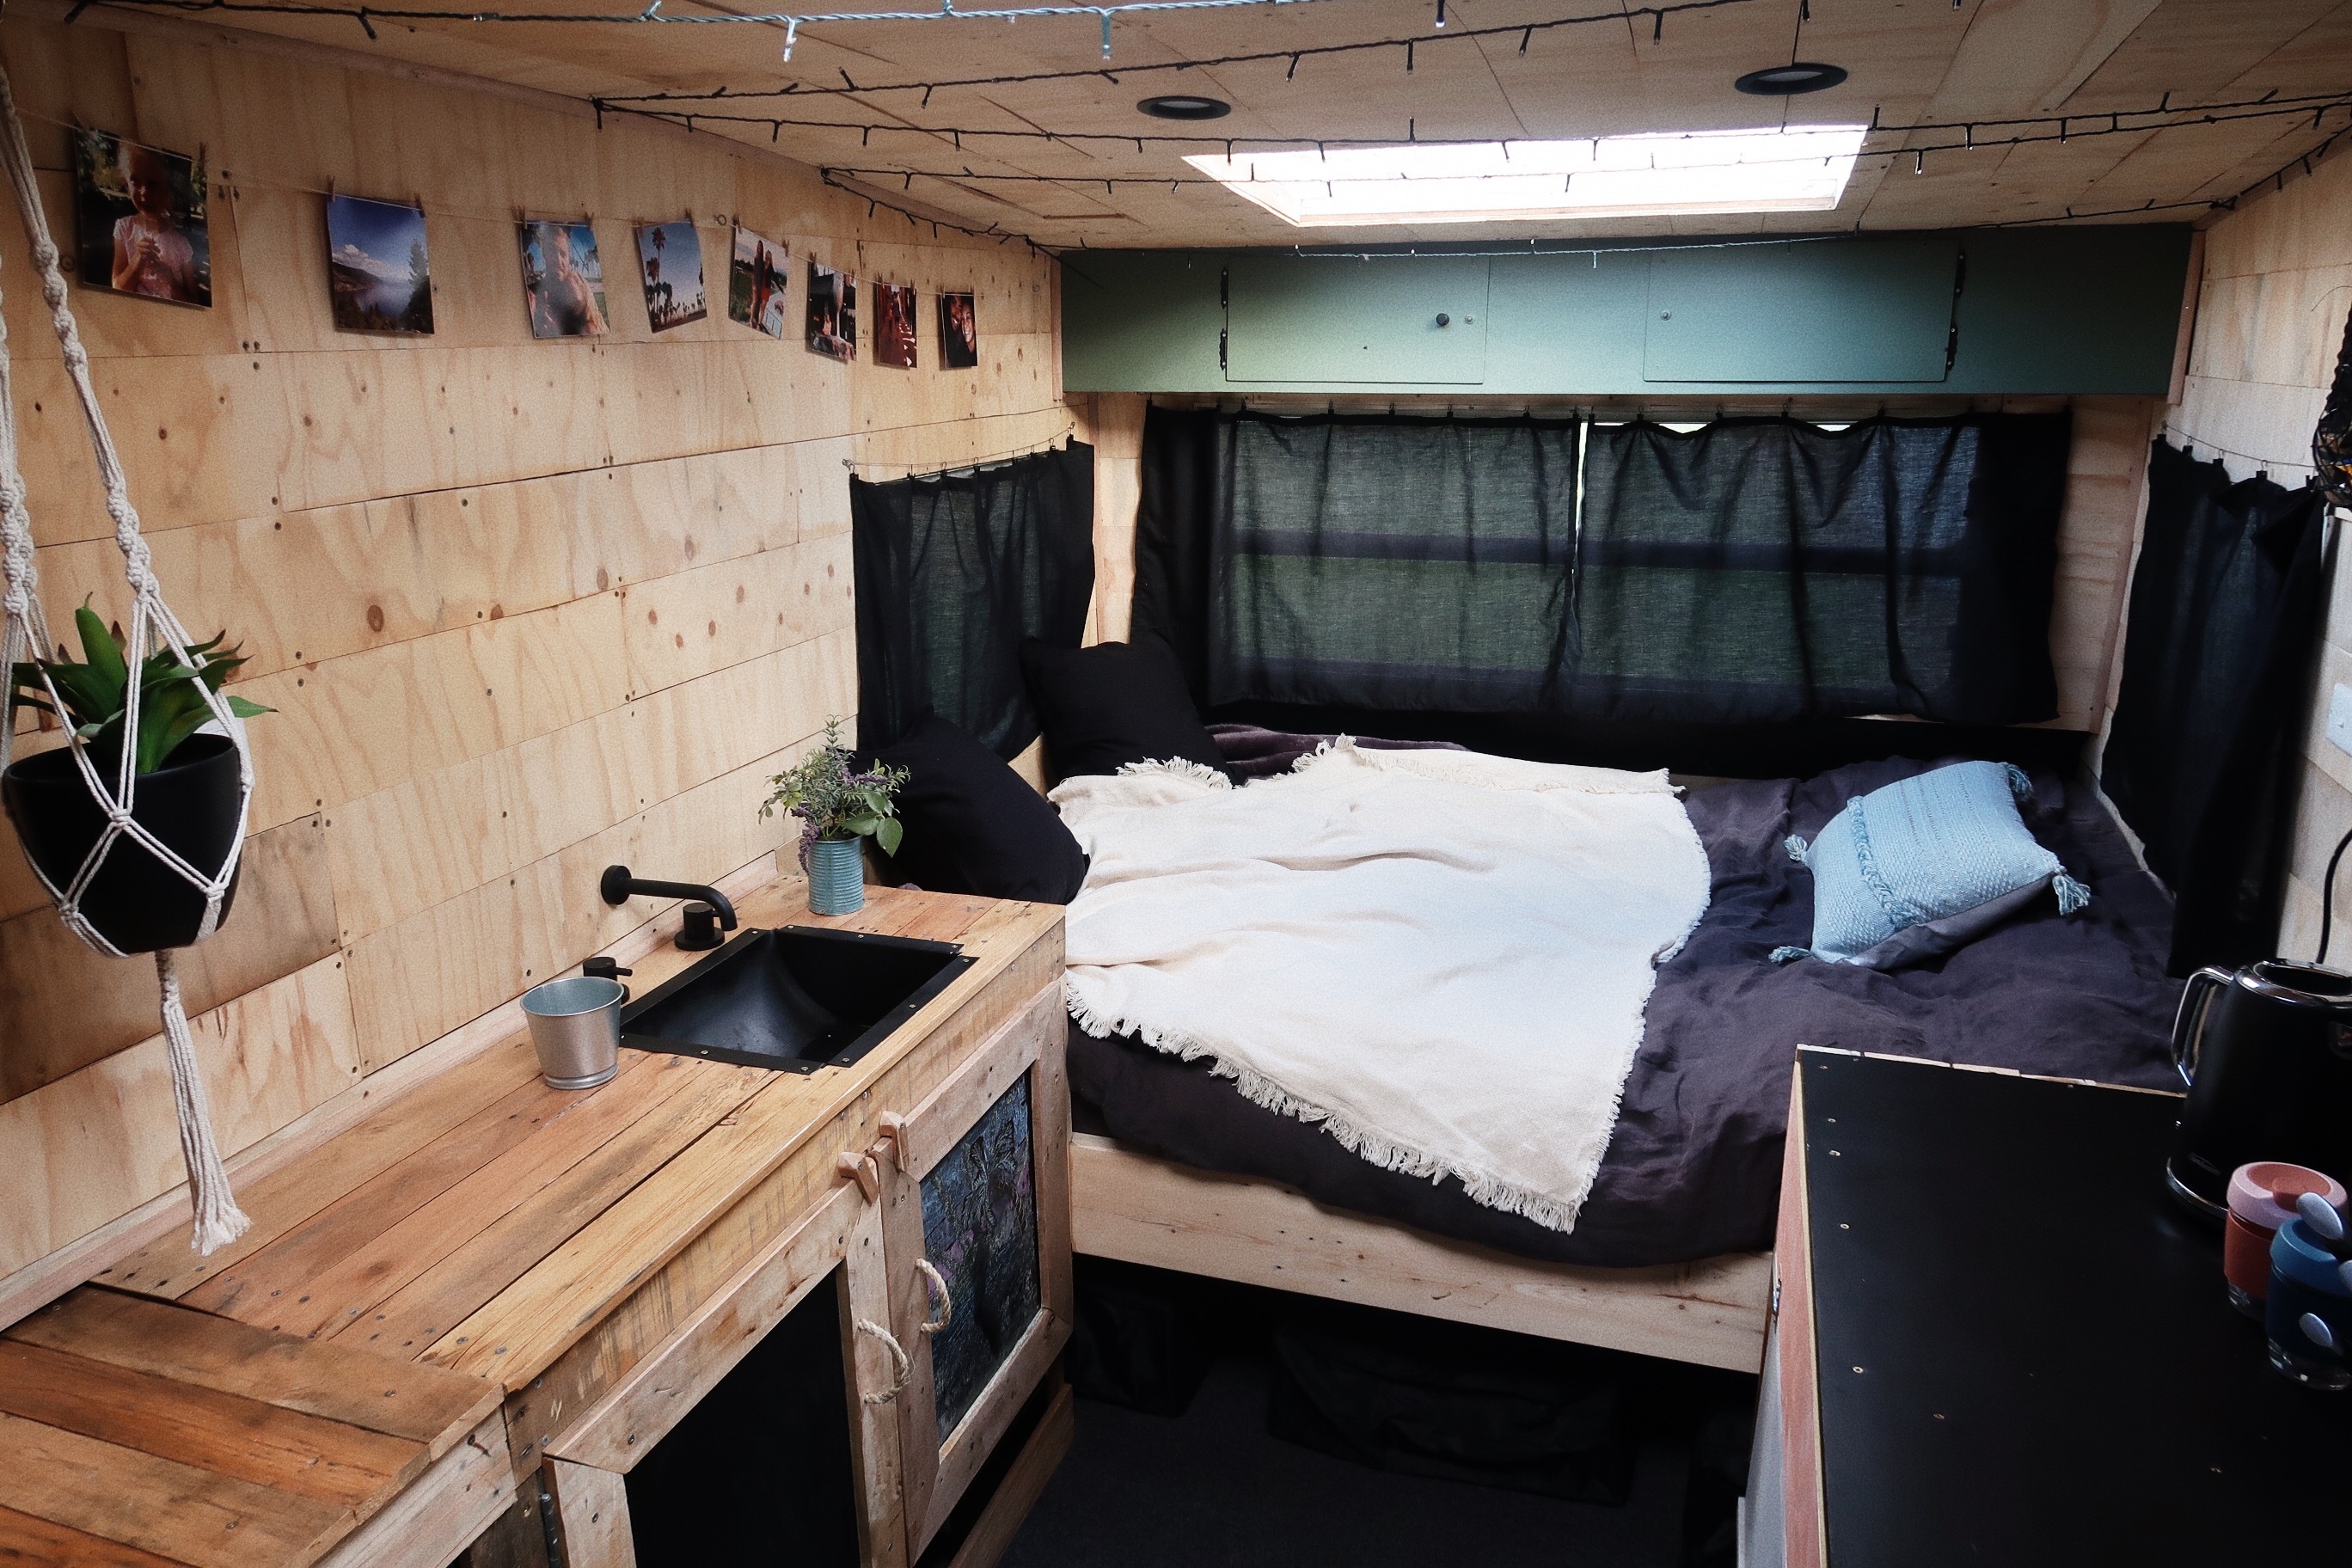
Restoring a van has been a learning experience for us, especially this being our first time doing a big project like this. I’ll write a short explanation of the process of restoring a van and hopefully motivate someone to do it for themselves, it is totally achievable! What we believe makes our van special is that most of what you see in furniture and design is made by us personally and we have done our very best to make Twiggy environmentally friendly. Twiggy is powered by the sun. Solar energy is one of the cleanest sources of energy and best of all its free energy. We set up 250 watt solar panel that charges a 98 amp/hour deep cycle battery which runs the fridge, water pump, our phones and accessories and LED lights. The wall cladding was sustainably sourced while the rest of the framework and cabinetry is all reclaimed timber. Using recycled wood saved us a lot of money too. Tip: big furniture/department stores have pallets at the back that they throw away so it’s worth asking if you can take a few.
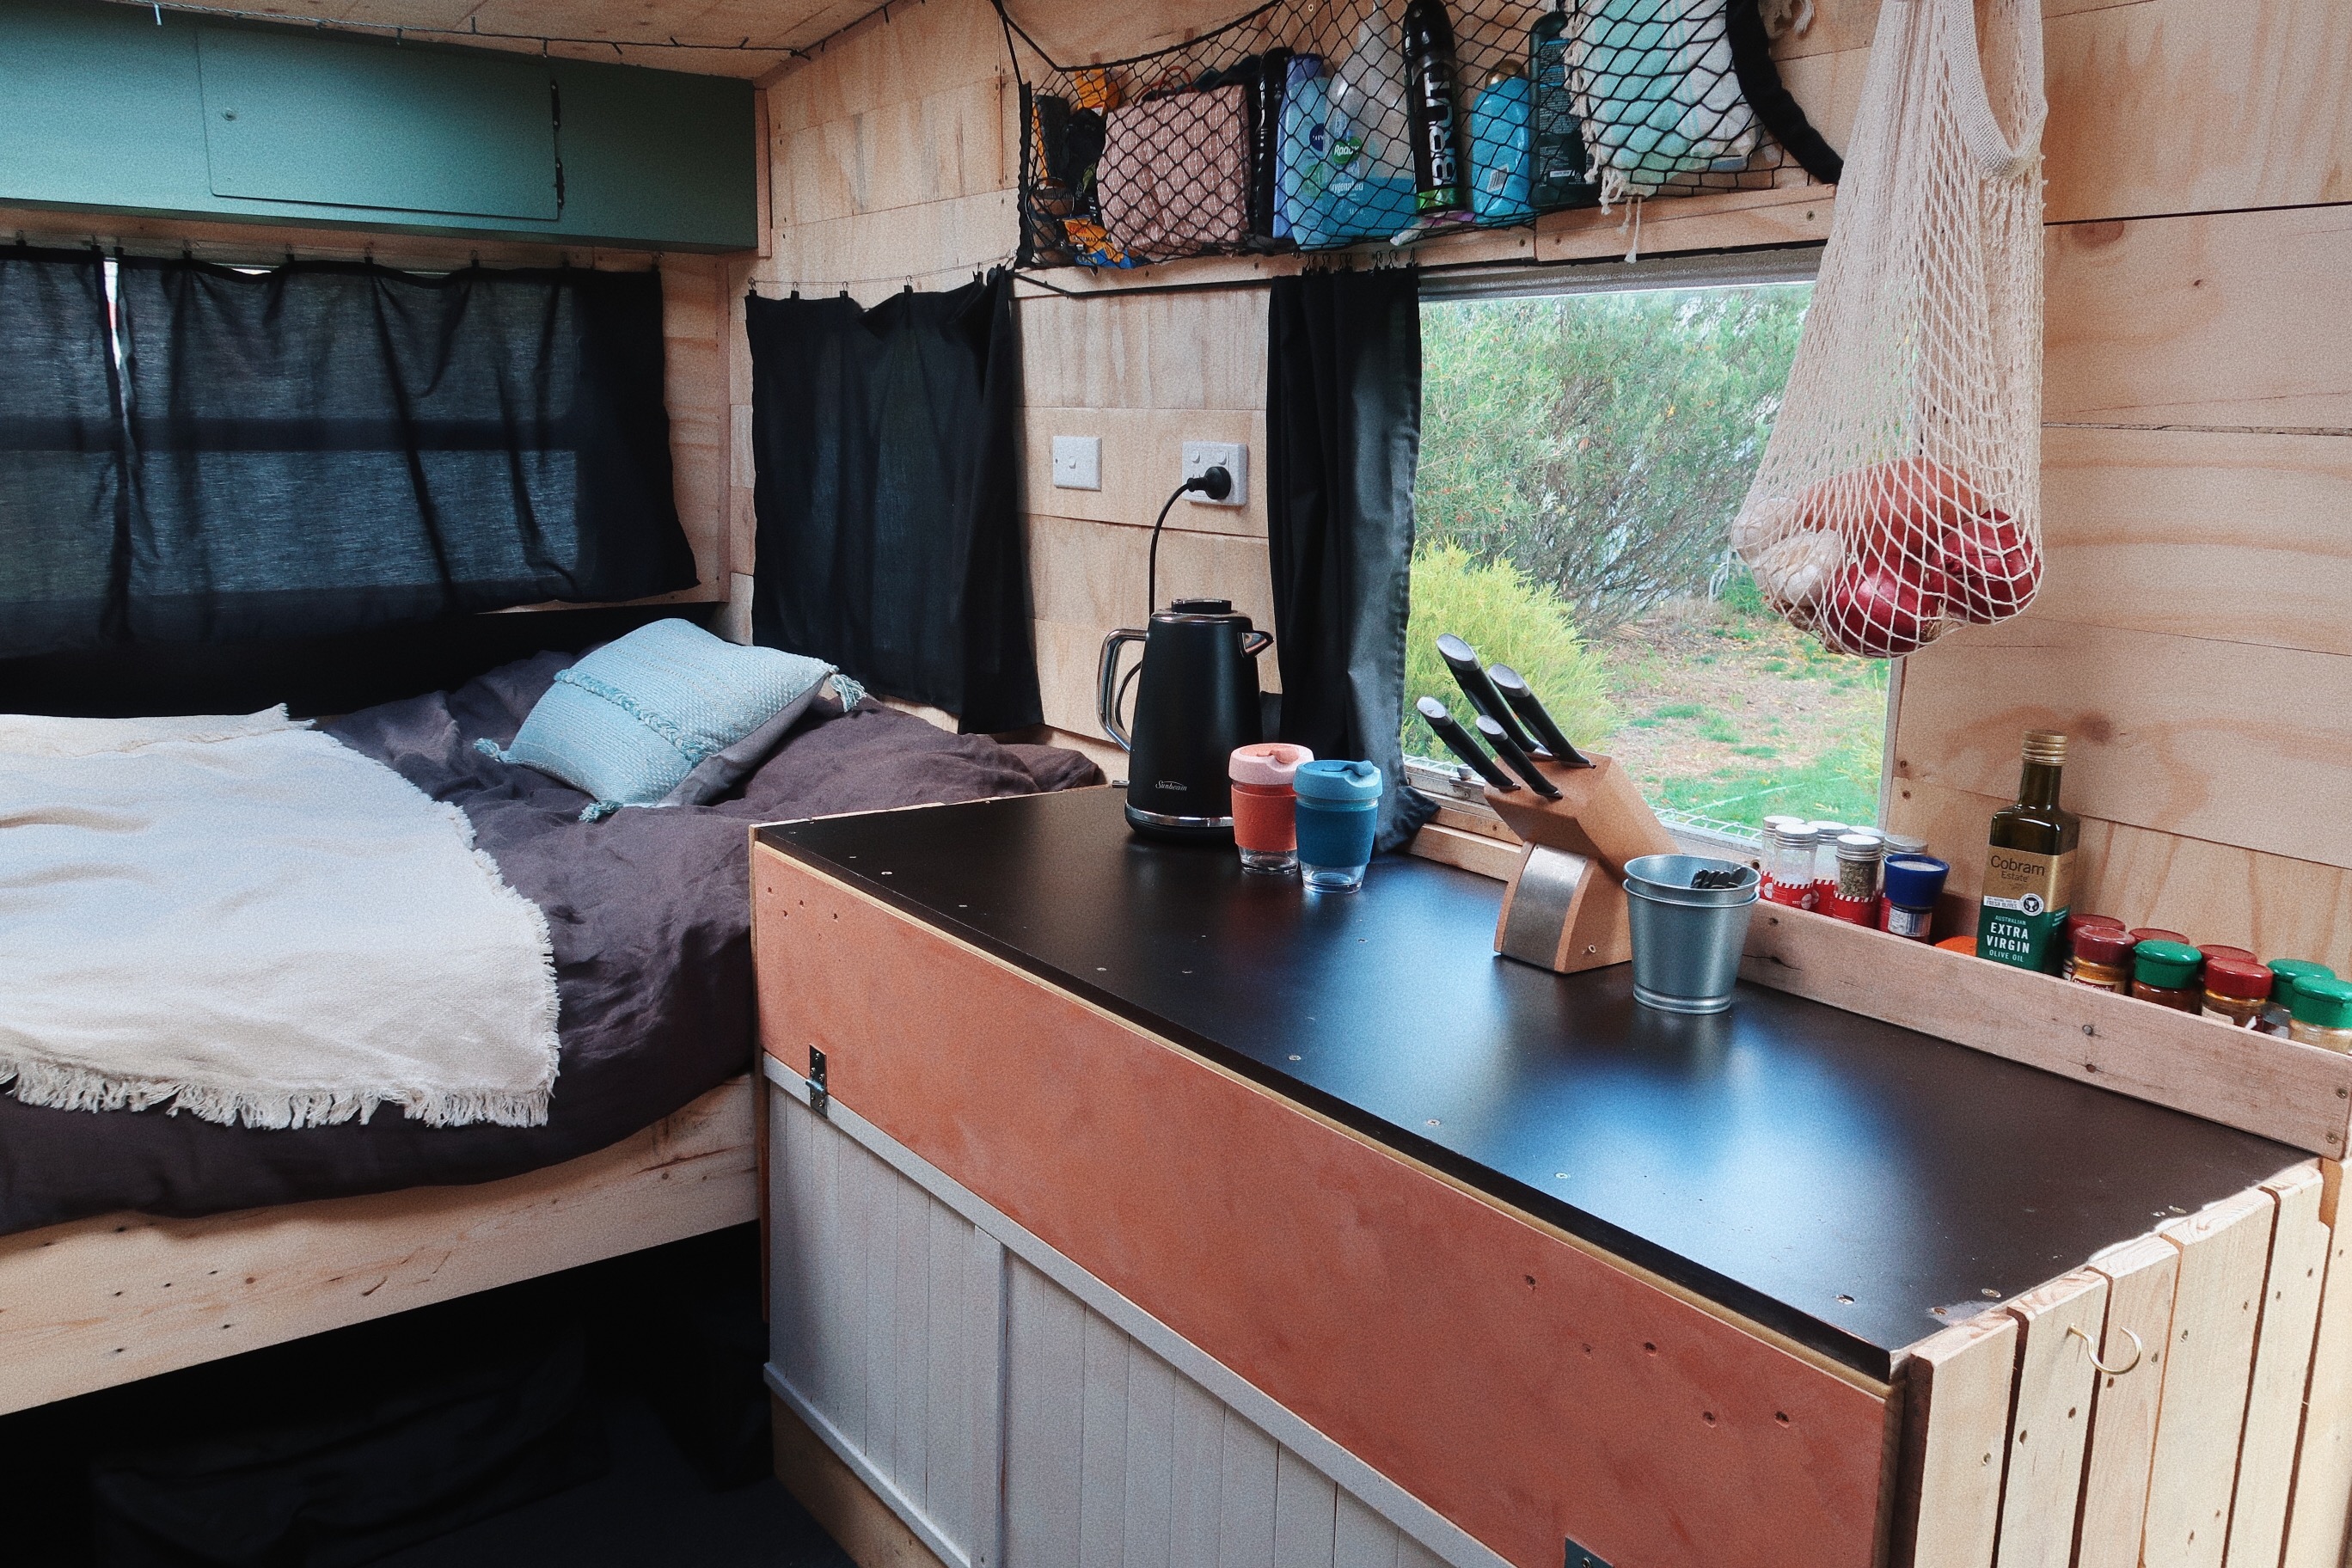
Interior
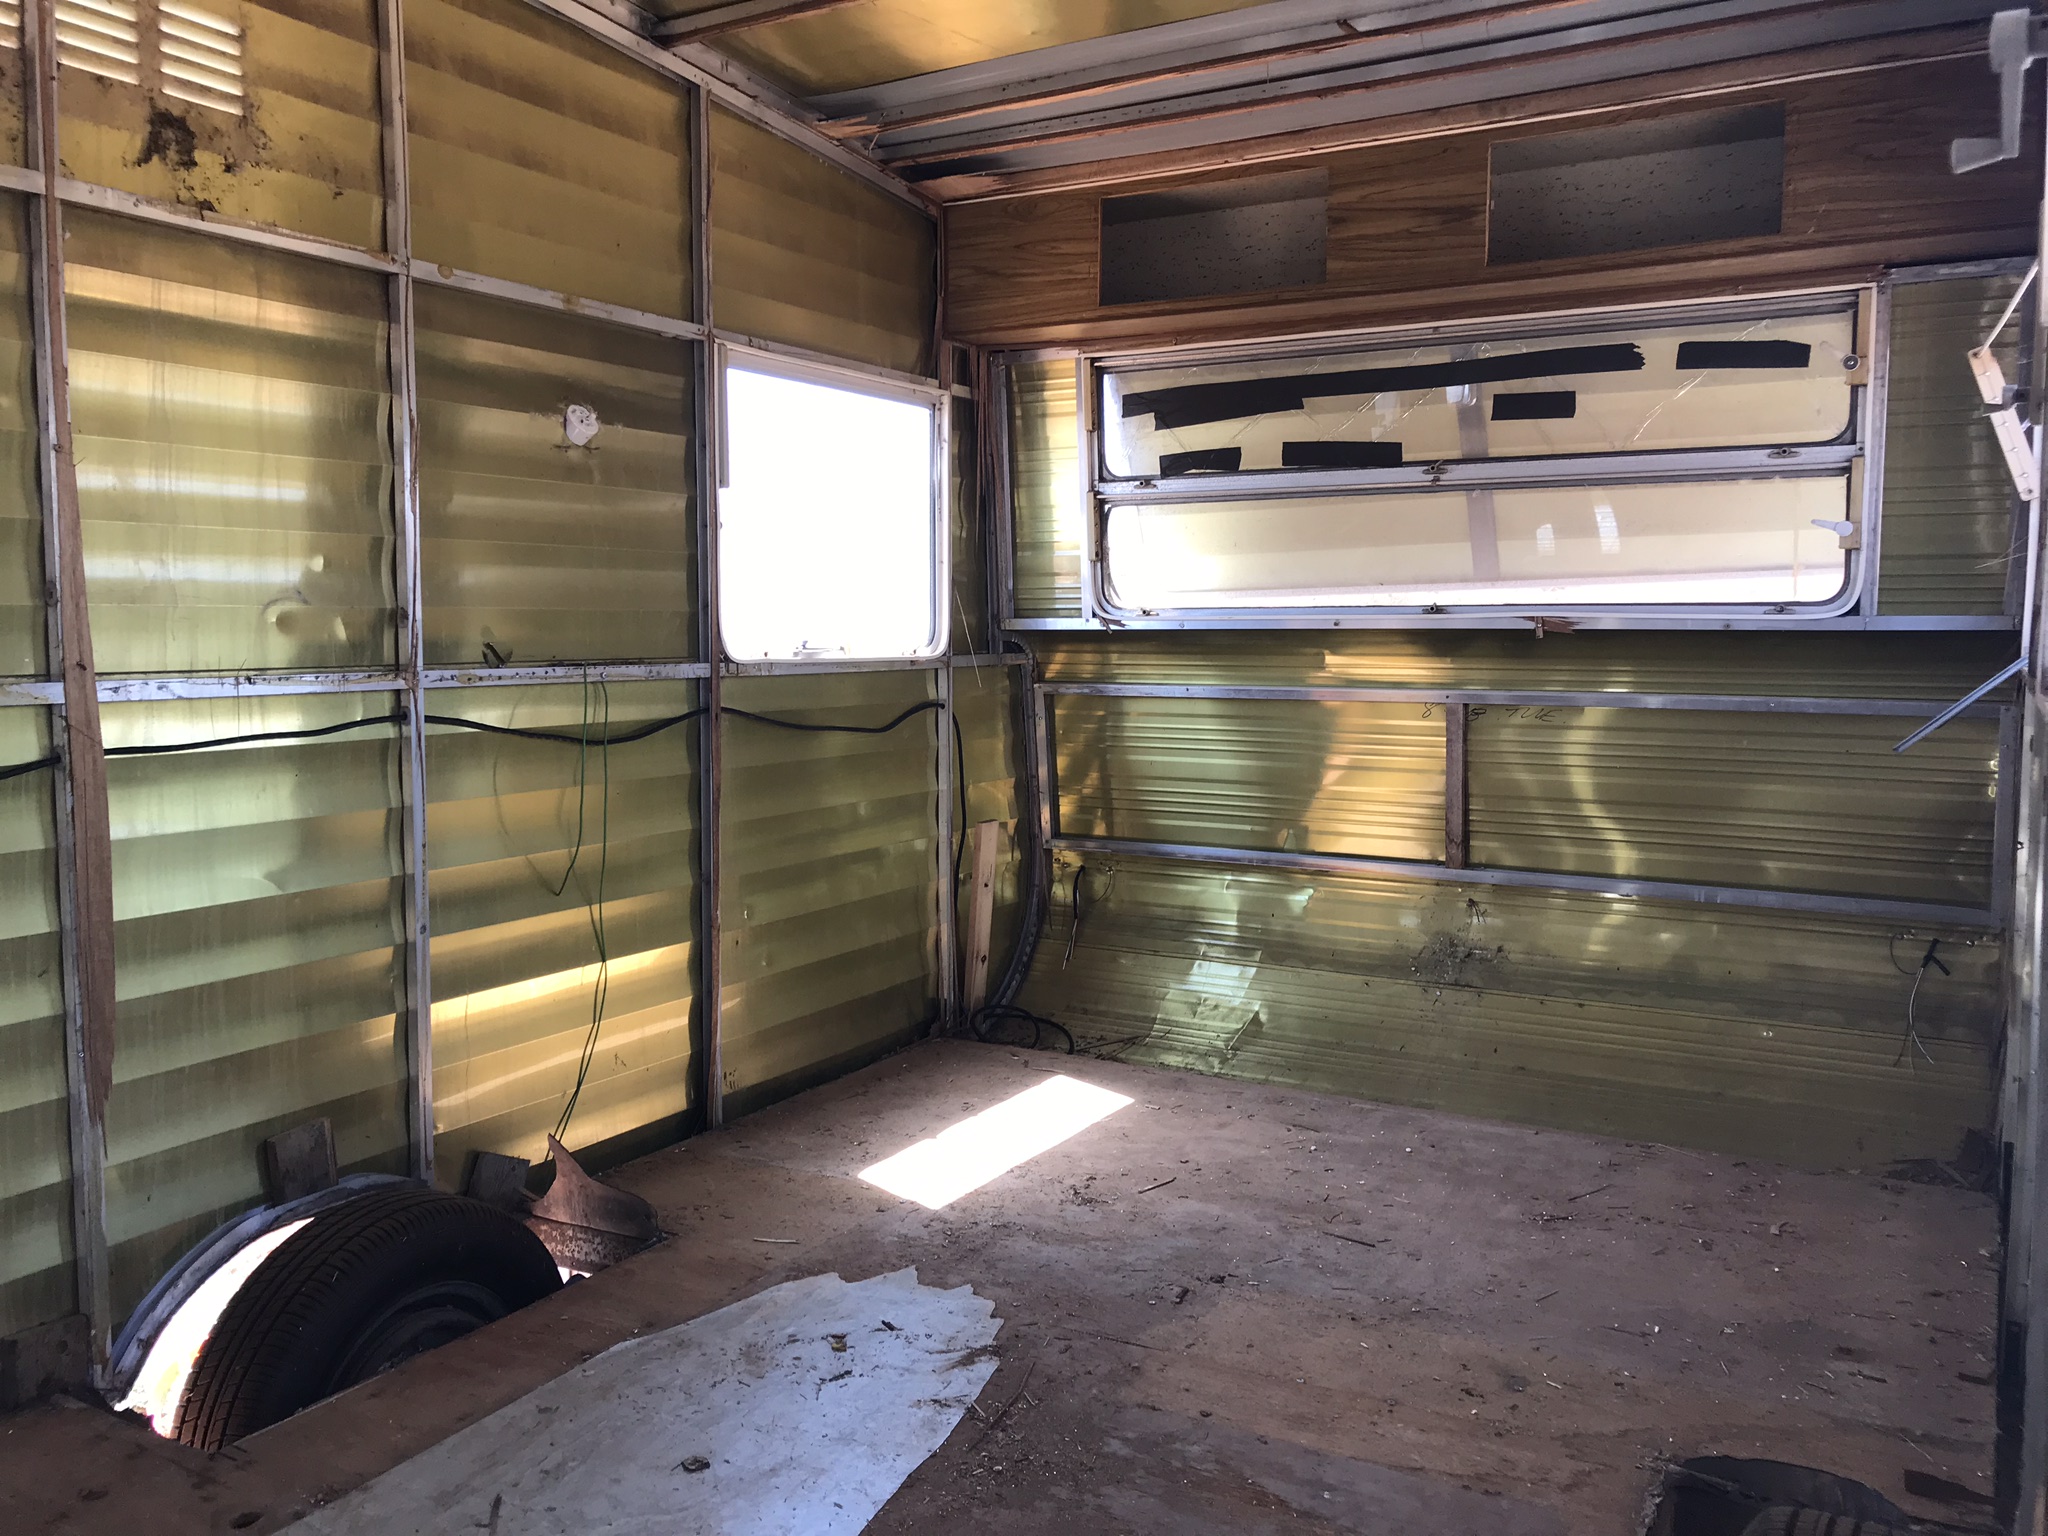
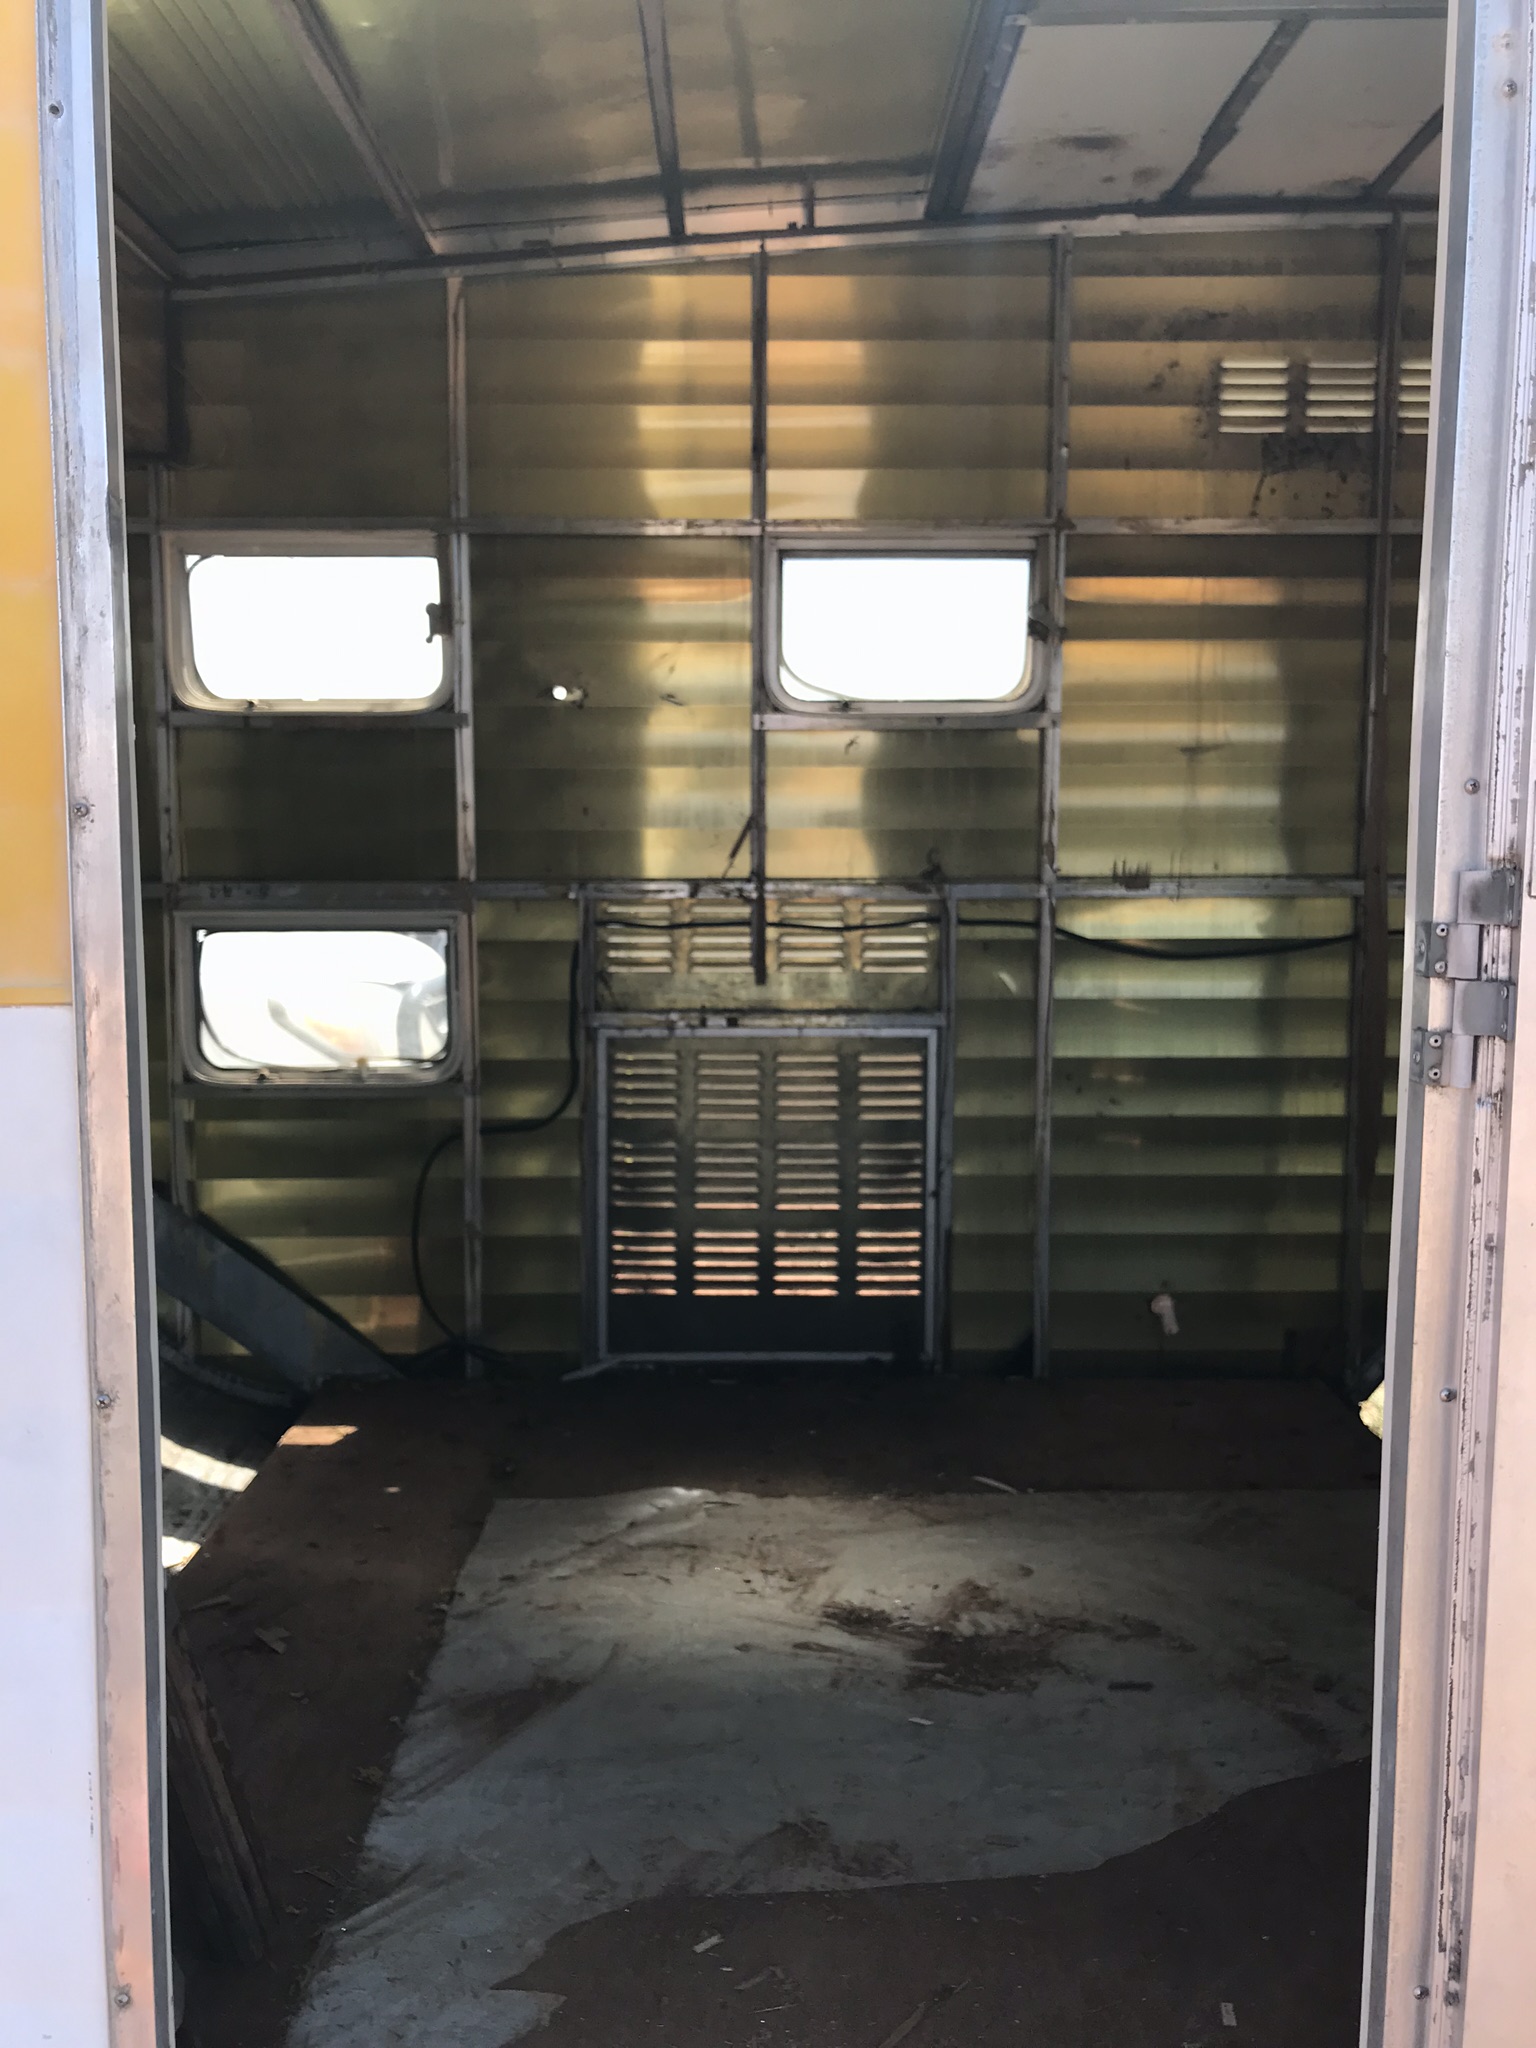
WALLS~ Back in the day, caravans didn’t come with insulation but with outback temperatures ahead of us we thought it was essential. We used FoilBoard sheets from Bunnings Warehouse to insulate the caravan. Tip: the shiny side of the foil board faces outwards for maximum insulation. Of course I did not realise that until half of the insulation was already put in. For the wall cladding, we bought sheets of plywood and cut individual pieces to fit on the wall to get the style we were after. Tip: this can be very time consuming, so be mindful. As for the roof, we installed a second skylight over our bed. This was done with Perspex sheets in lieu of glass because it was cheaper and simpler to install. The entire van had to be rewired, we advise you to get a sparky to do it, or at least look over your work. Tip: legally, all caravans need double pole power points.
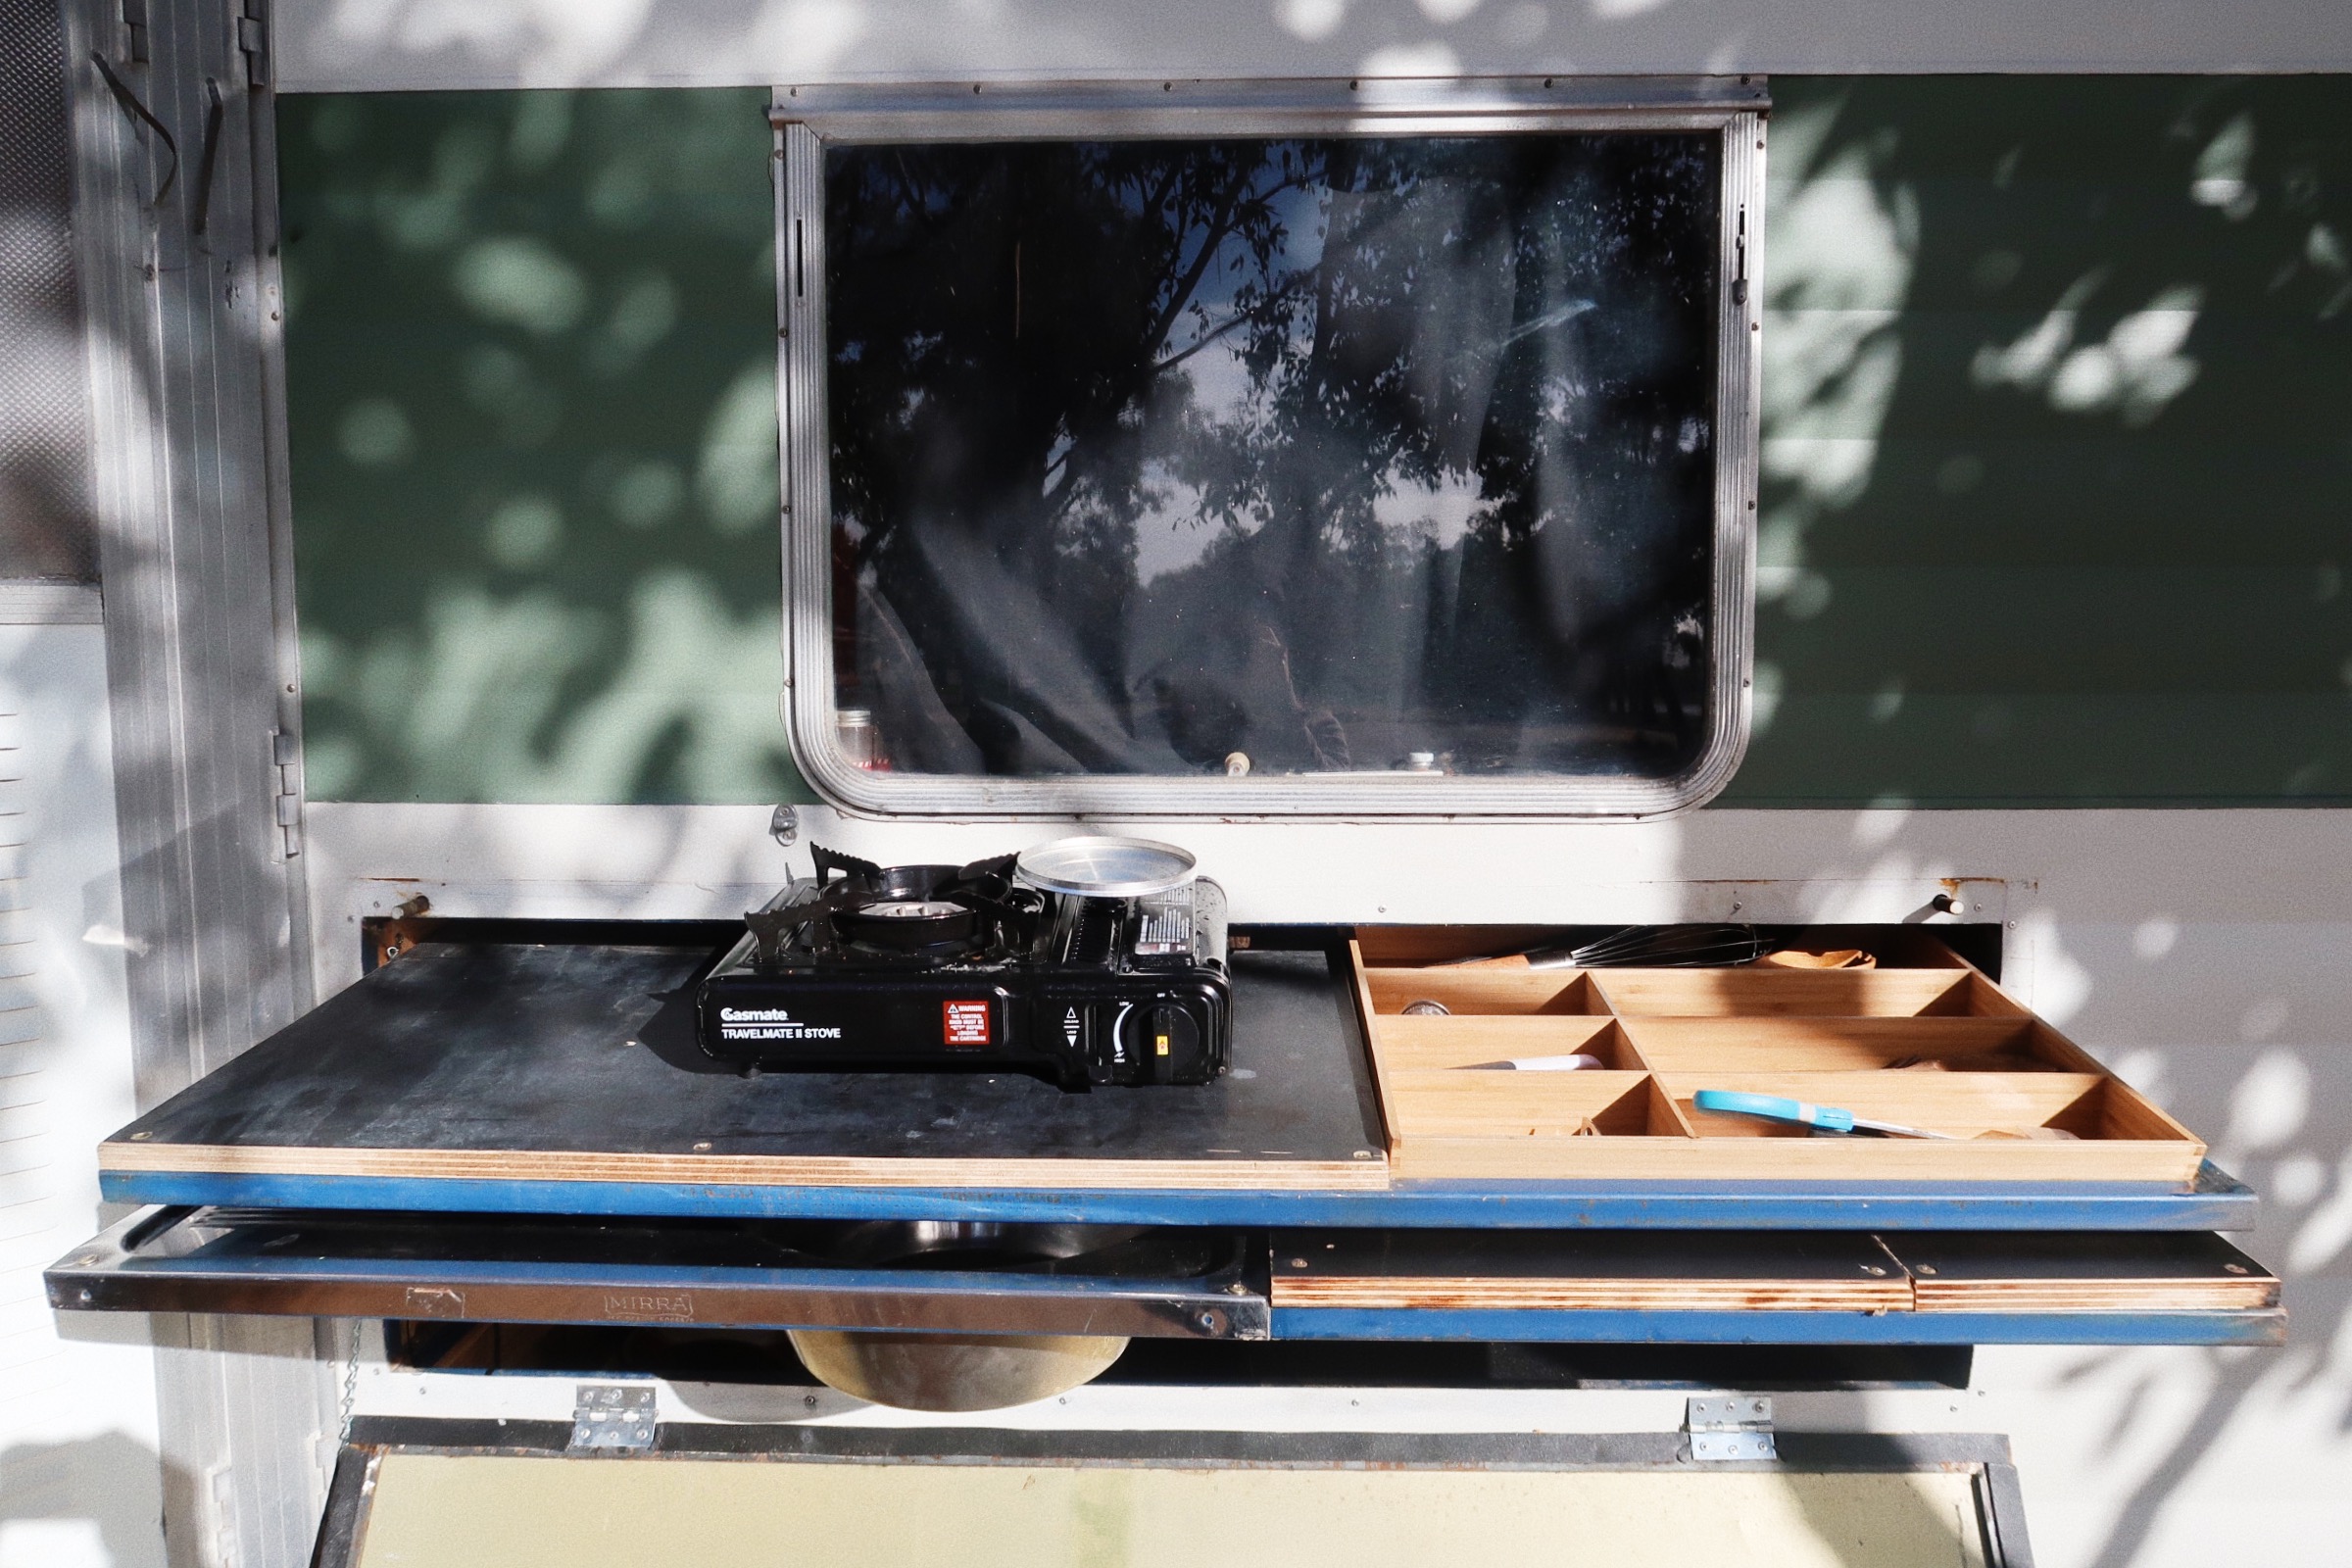
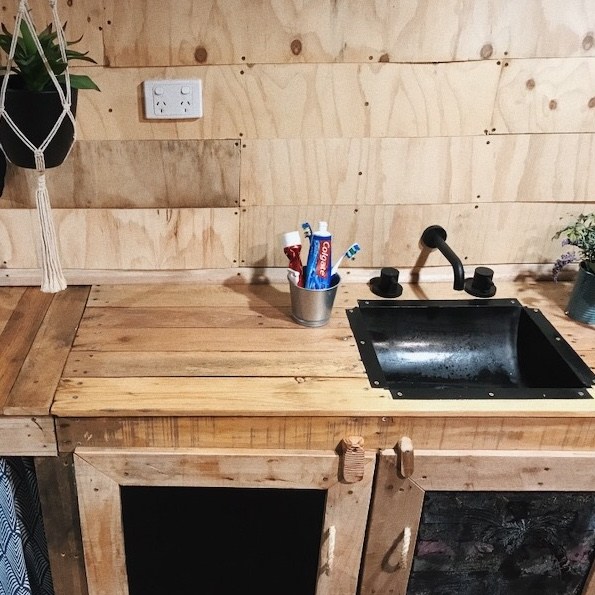
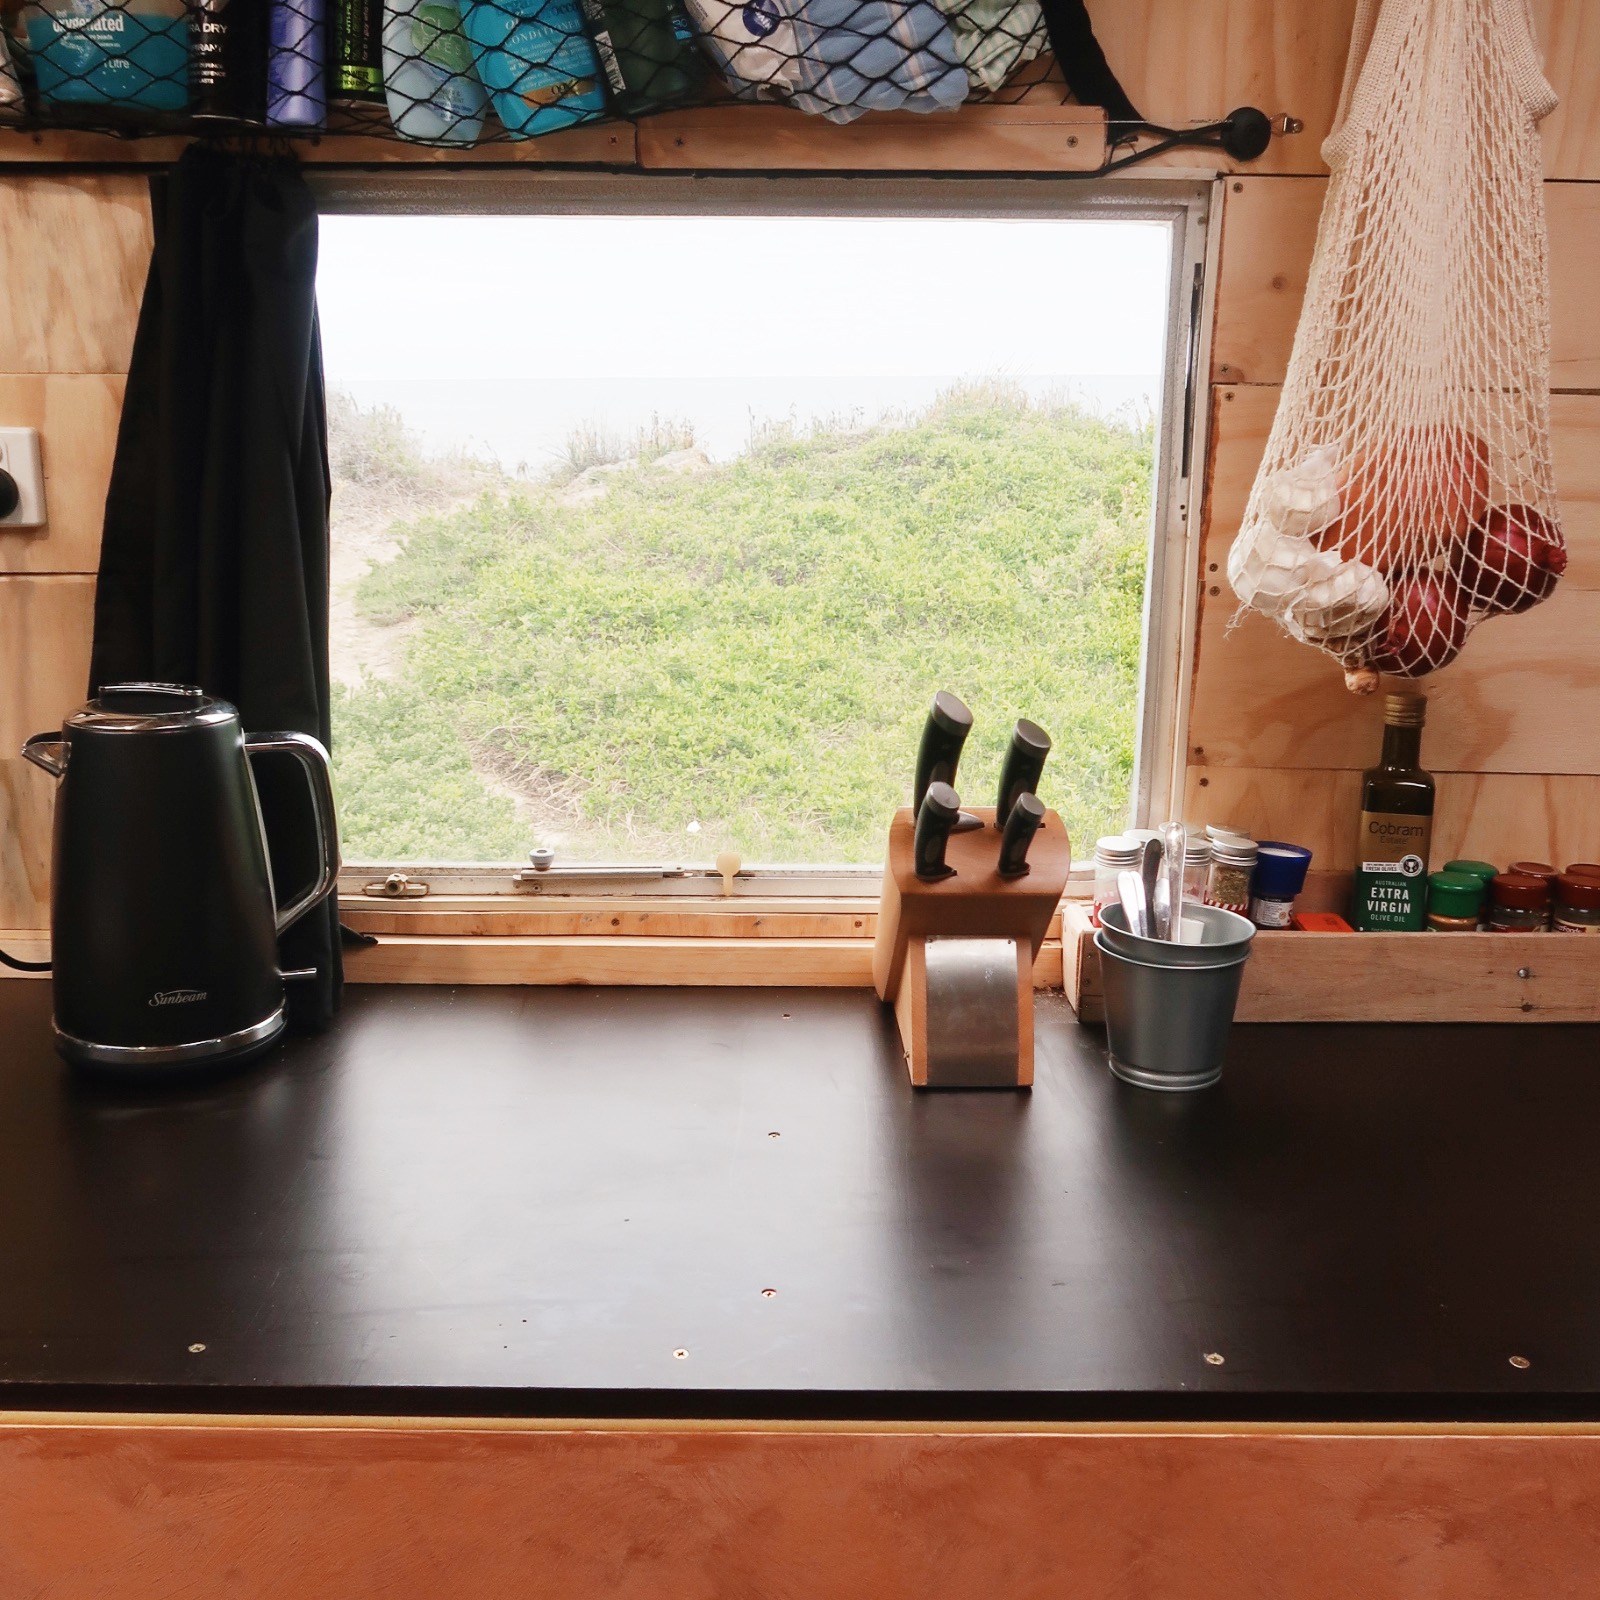
STORAGE ~ we used some of the existing storage and restyled the cupboards to our liking. We built a bathroom area with a custom built sink which has lots of room for storage, including our fridge and battery. We have also built a large bench which stores our outdoor chairs and larger items. To save space and avoid strong smells, we decided we wanted to make an outdoor kitchen. Sam cut a whole in the caravan and built a pull out kitchen with a sink and all of our utensils. Living in a van we prioritise making everyday items easily accessible. We attached a cargo net to the wall to store little items such as our toiletteries and basic everyday necessities. Tip: we recommend using dividers and shelving to segregate your storage while travelling. We lined the cupboards with carpet to avoid movement during travel and it has worked great for us.
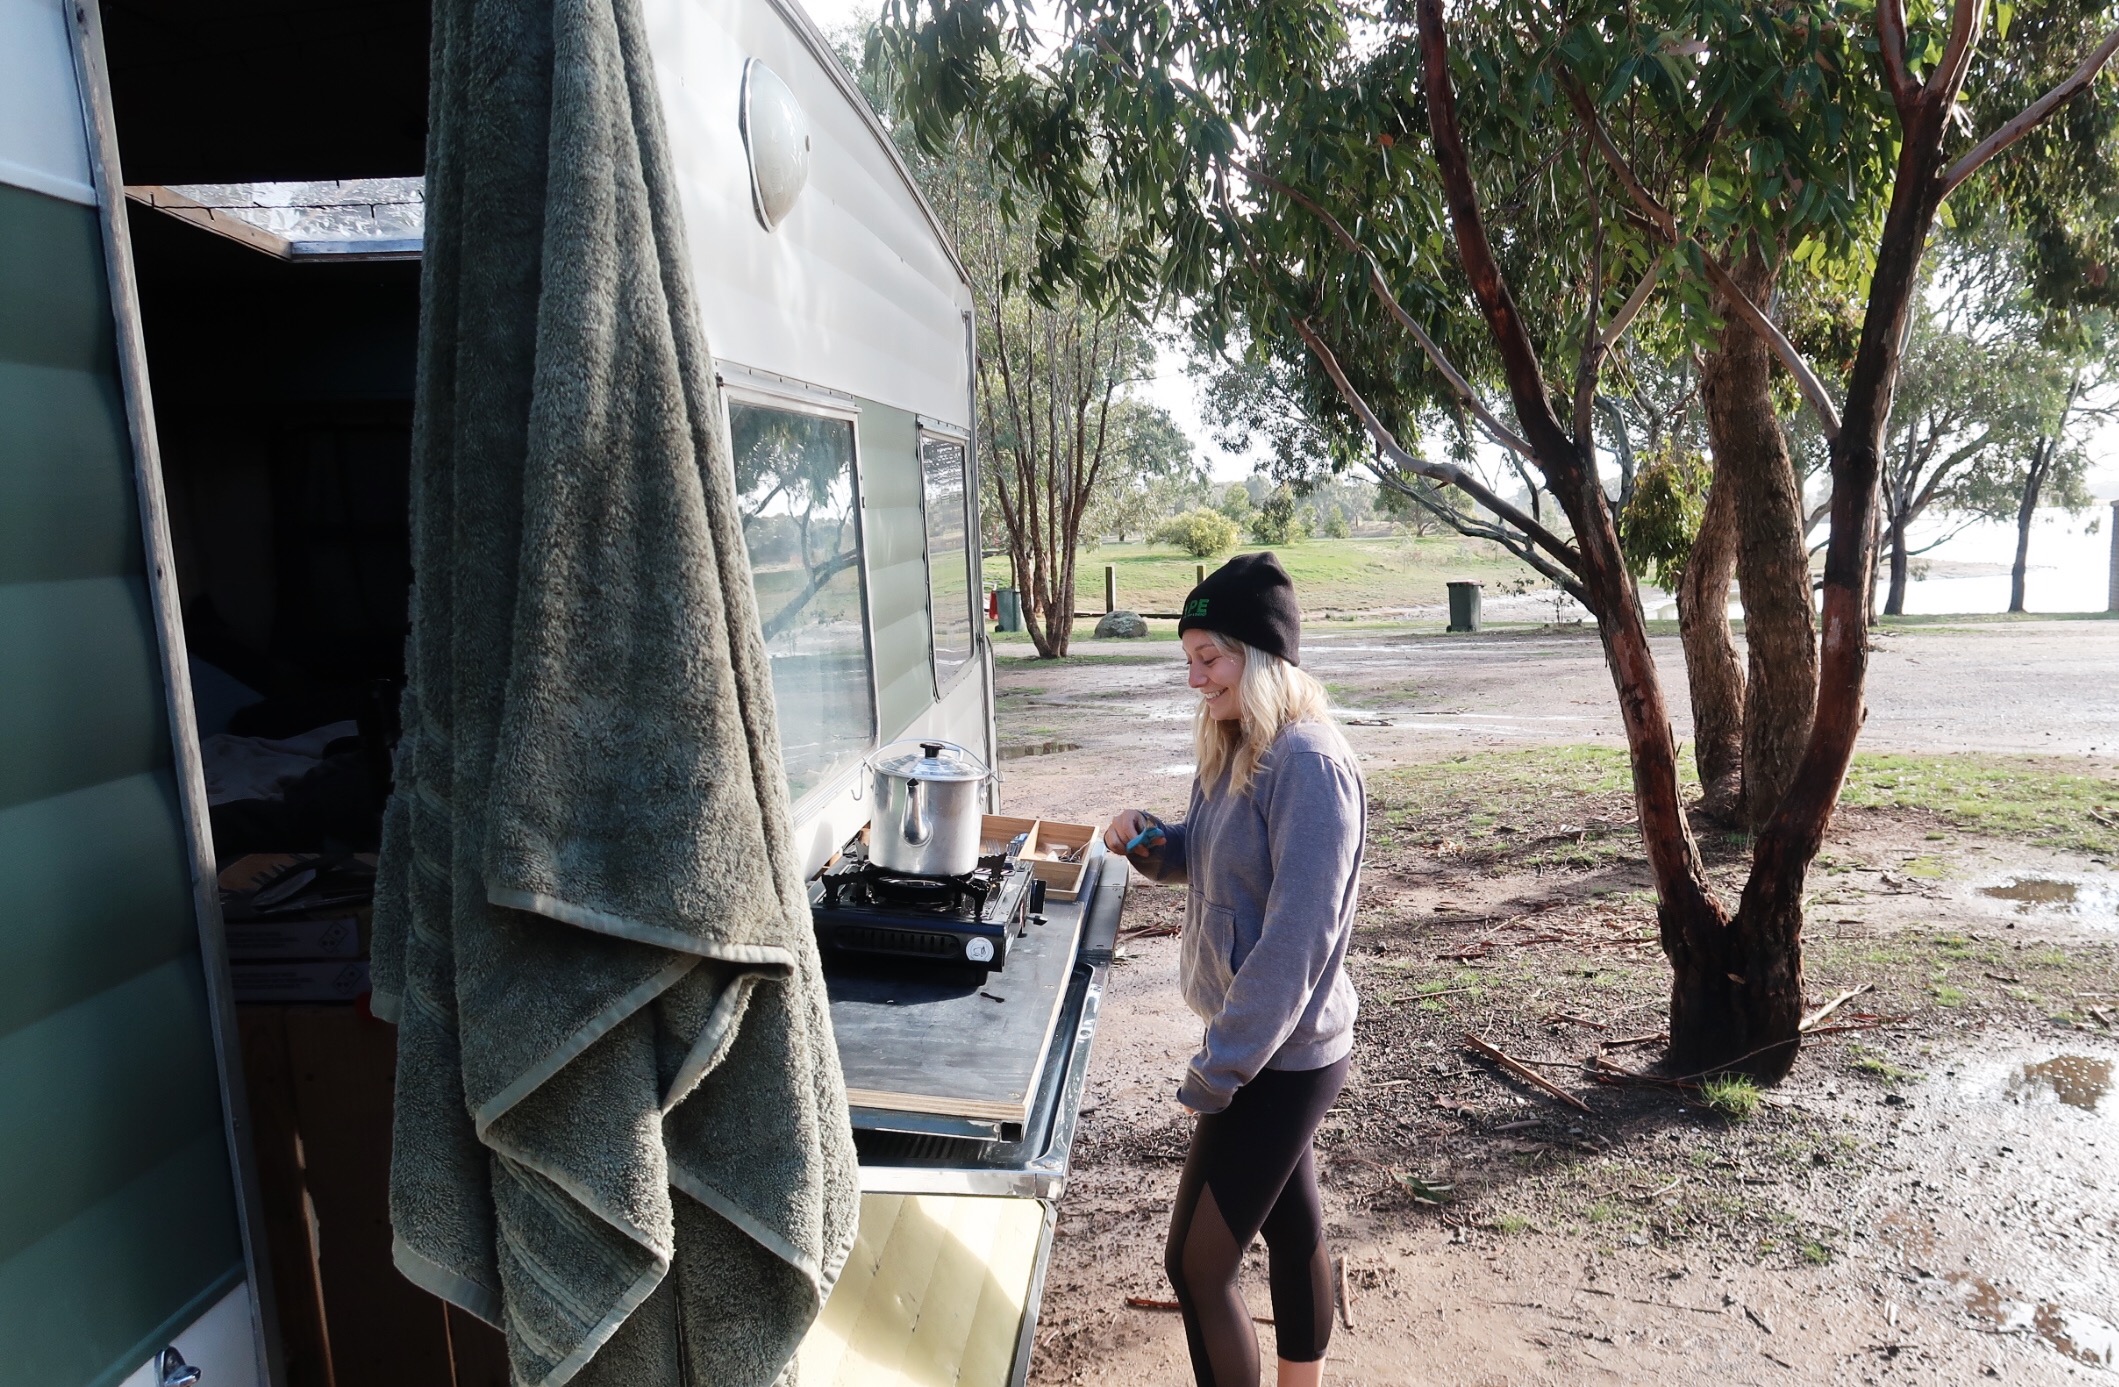
DESIGN~ Luckily, Sam and I have very similar taste in style and design. We both agreed the old 70s timber veneer had to go, replaced with a rustic modern look. We both envisioned matte black appliances against light pine paneling with earthy colours. Fairy lights were a great addition to Twiggy, it adds cozyness and potentially can save you electricity. They are solar powered lights which we found were great source of lighting at night time. Building my dream aesthetically pleasing van, I never imagined having carpet on the floor but I highly recommend it. We installed marine carpet which keeps the van warmer, easier to clean and handles damage better.
Exterior
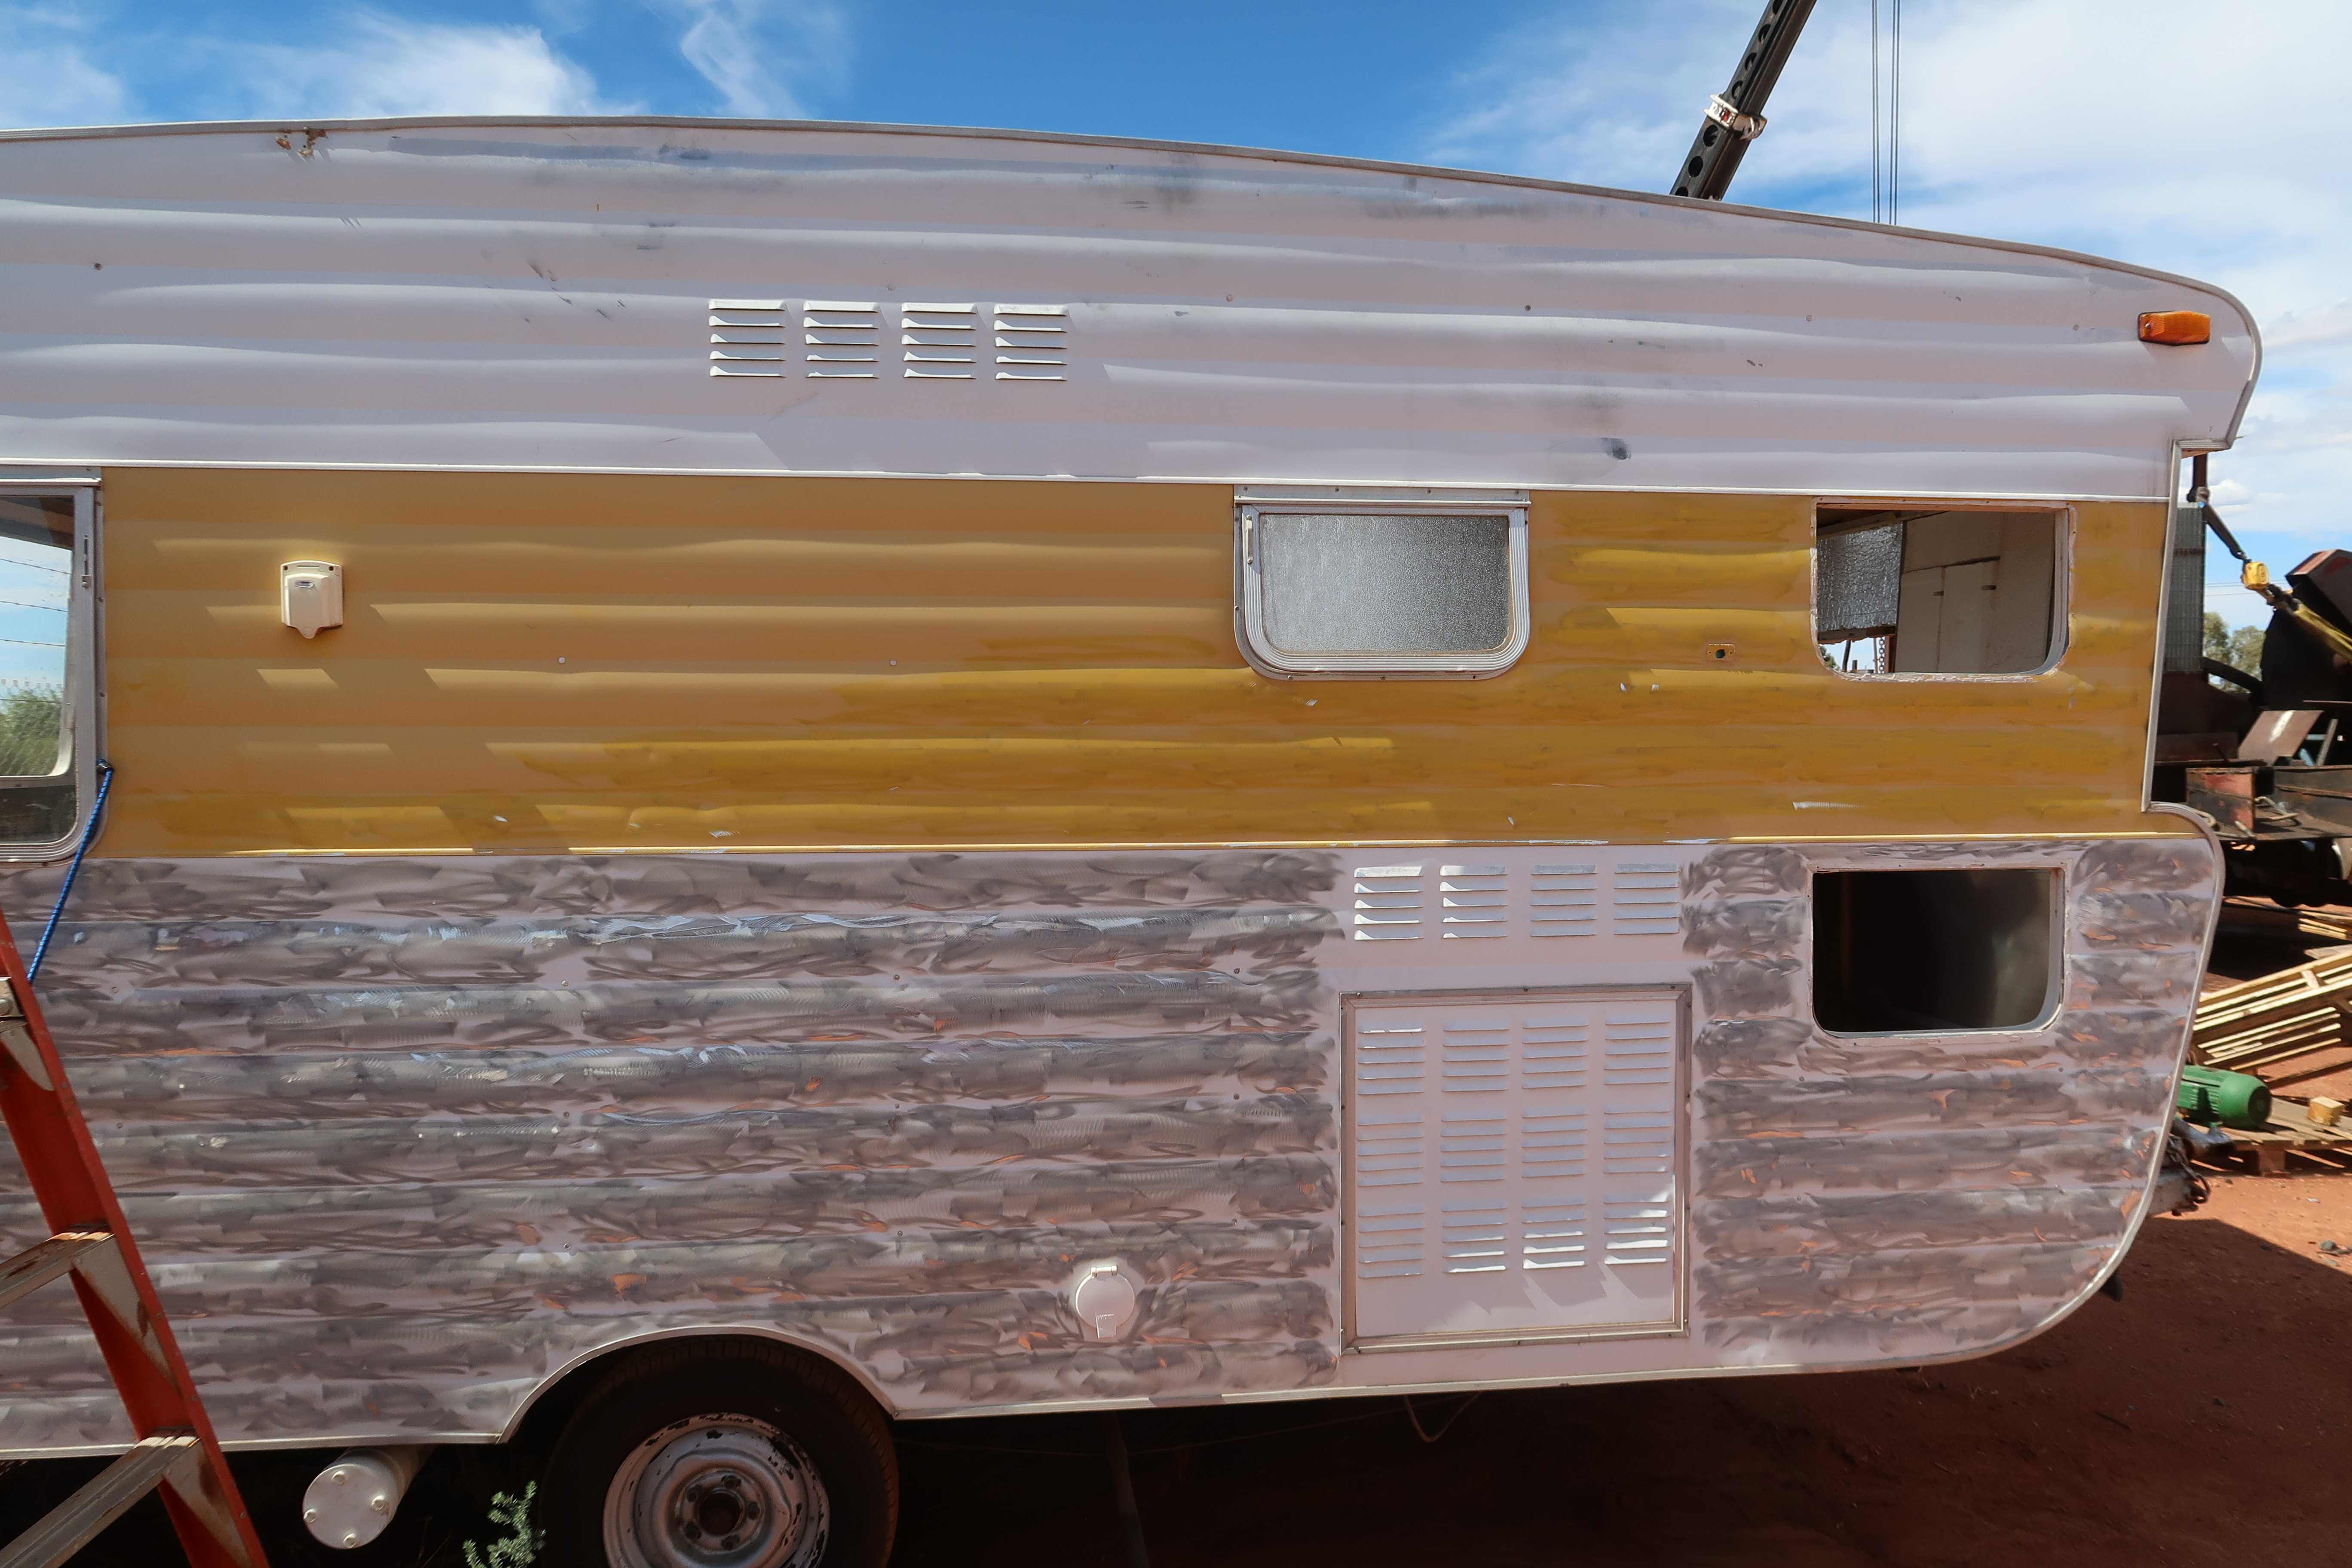
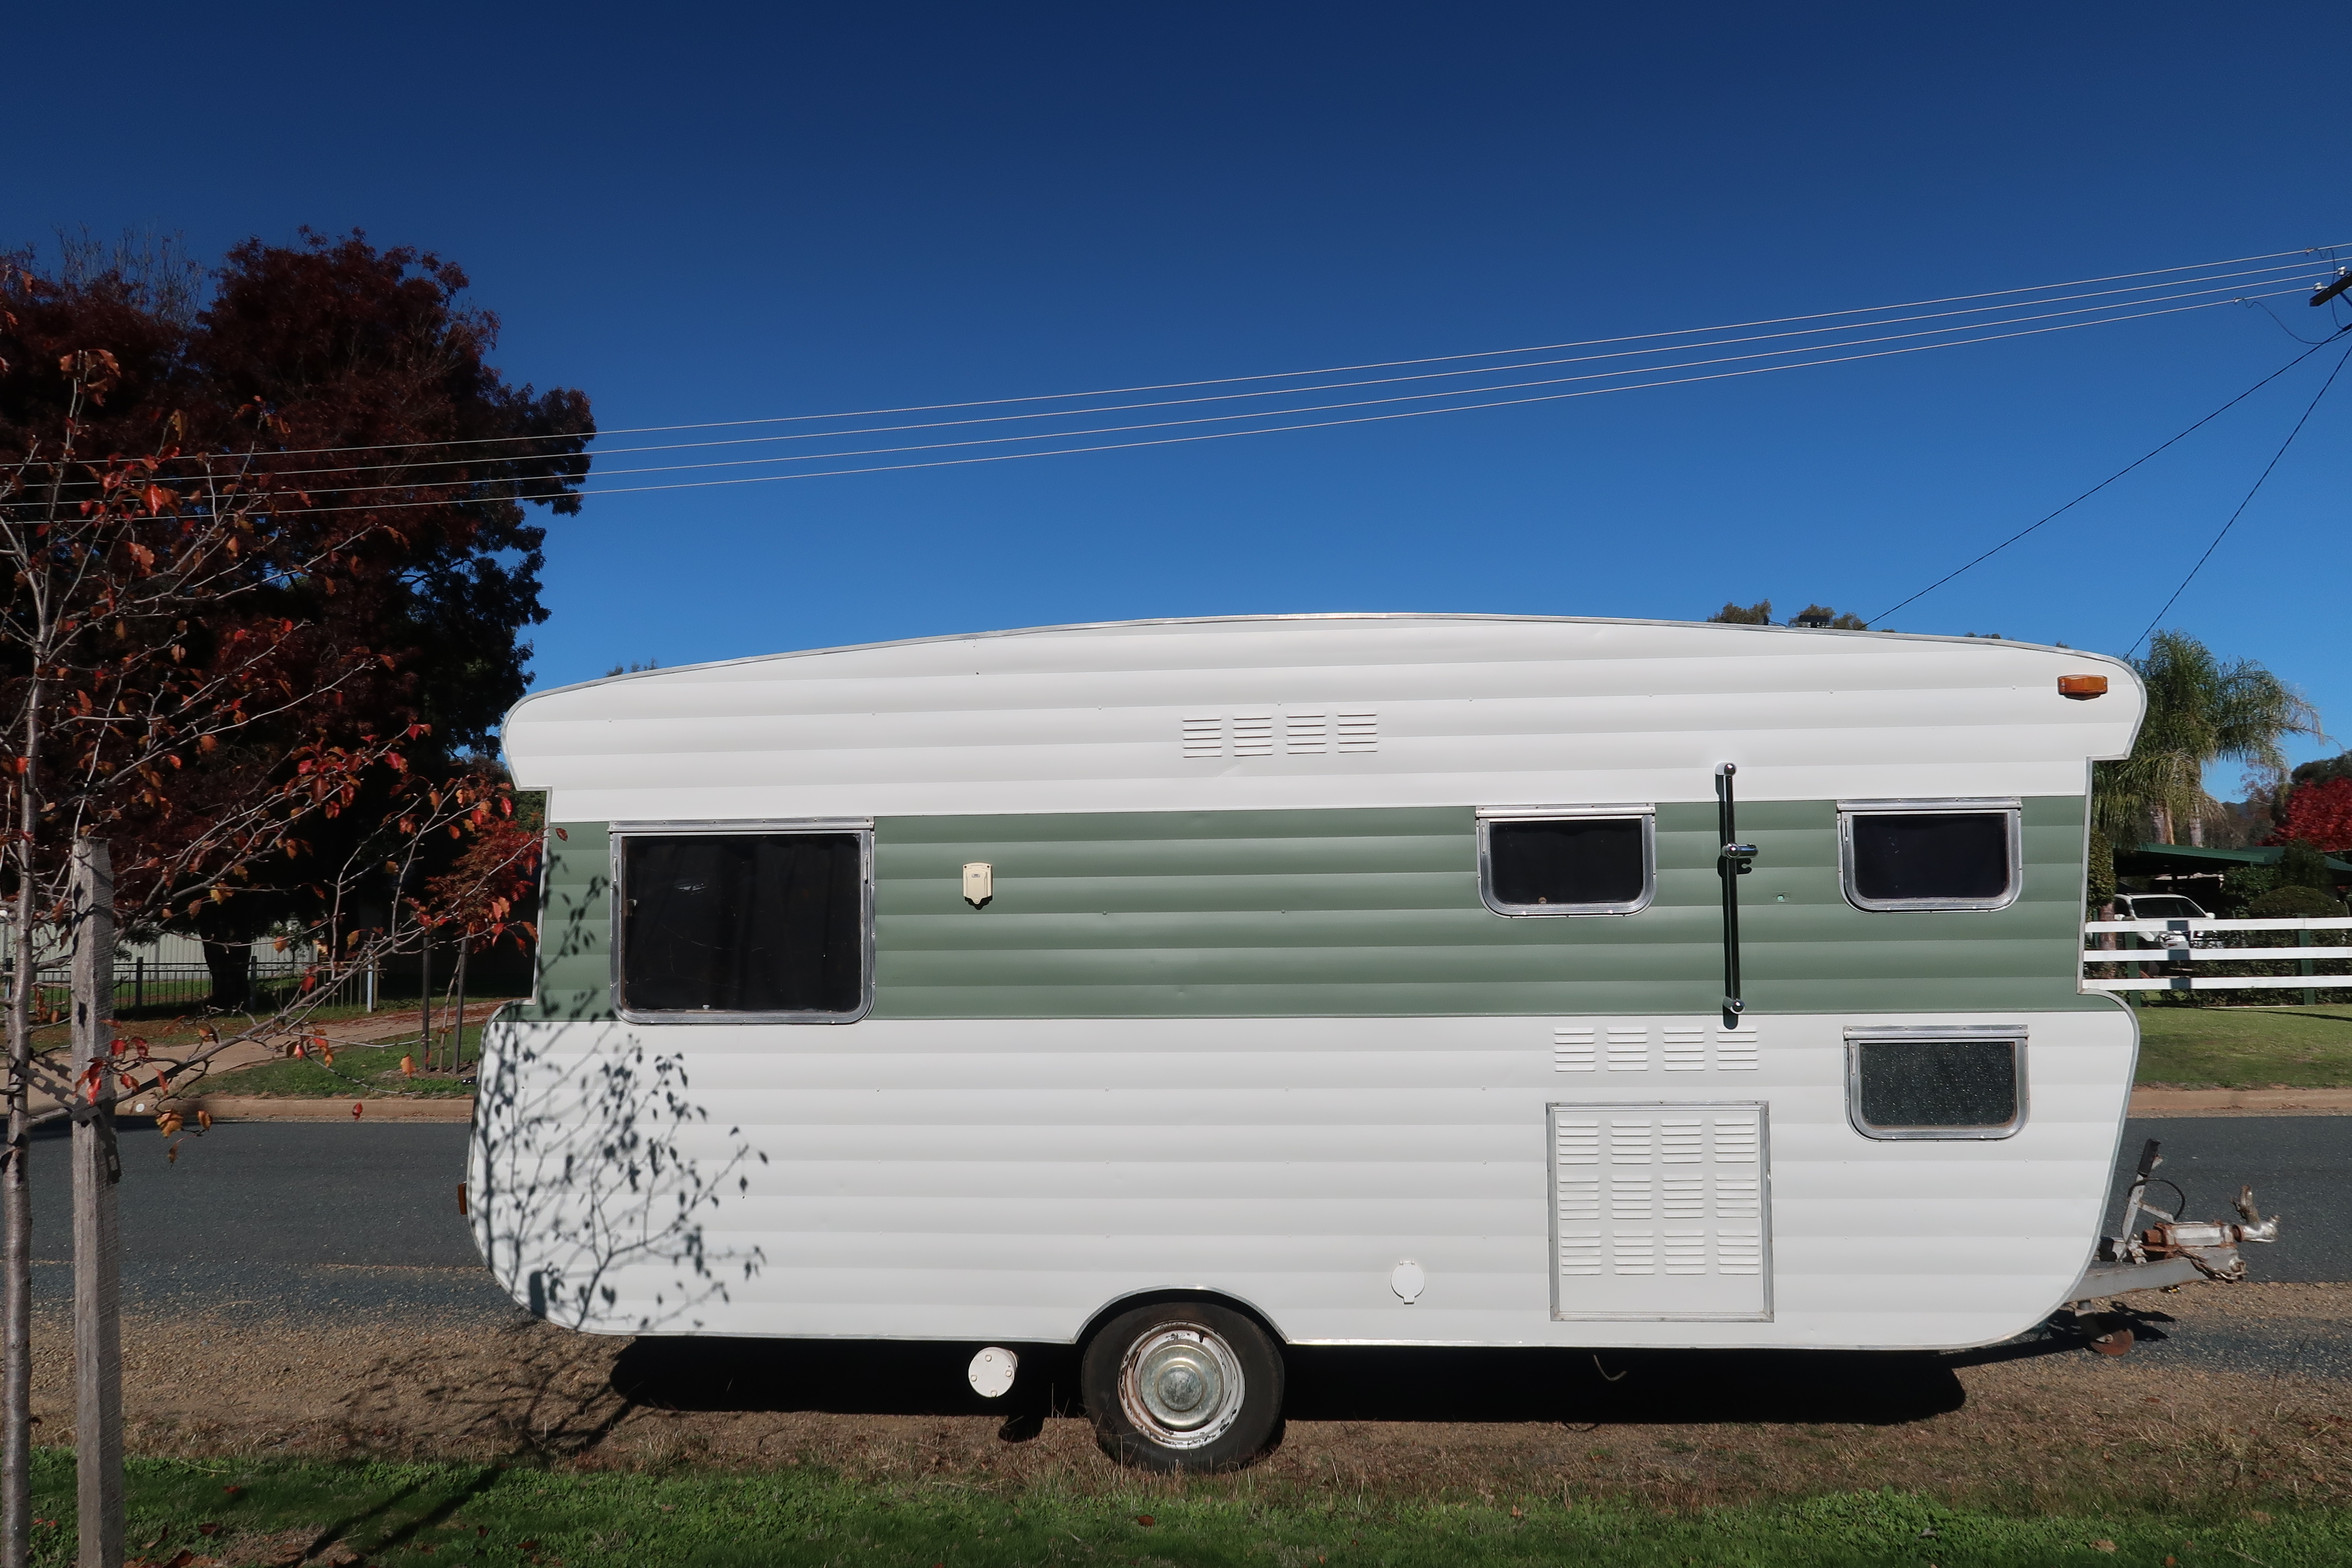
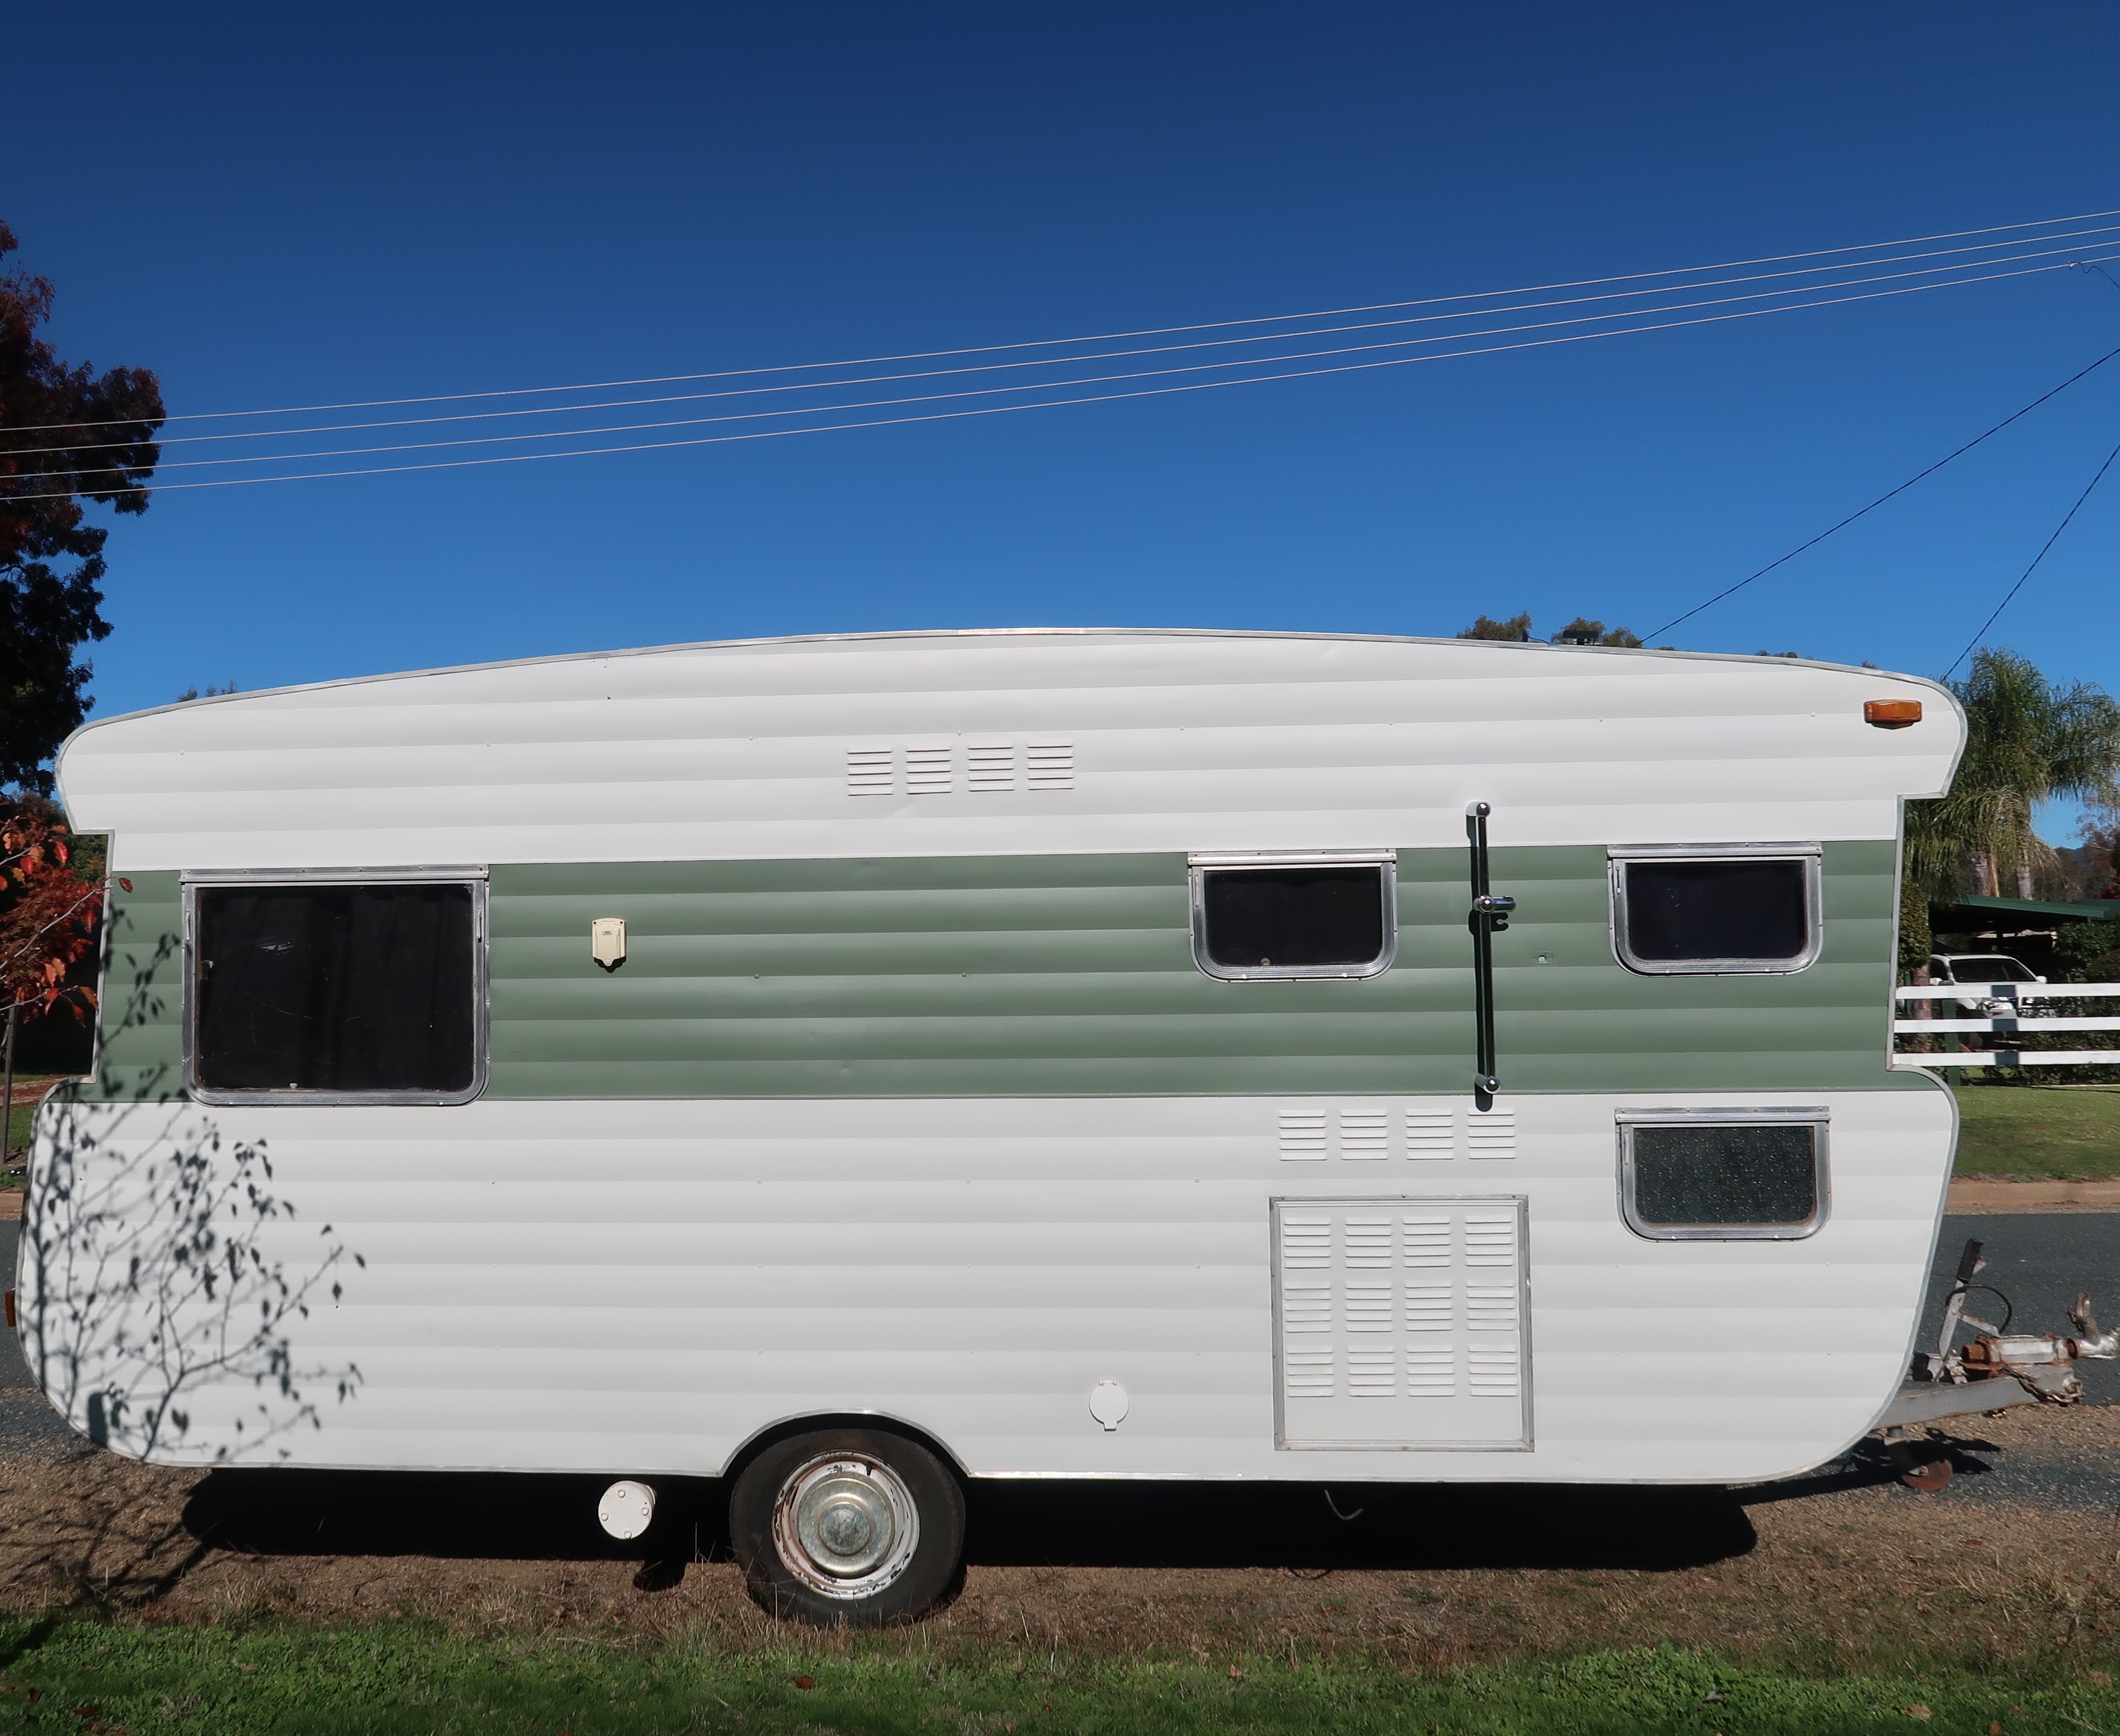
PAINT ~ The outside of the van needed a ton of work as well. We purchased exterior Colourbond paint called Pale Eucalypt for the stripe and Surf Mist for the rest. I used a small paint brush for the entire van, giving it 2 to 3 coats where needed. It was time consuming but we are extremely happy with how the paint turned out. Tip: last minute touch ups will probably be needed so don’t throw away your paint! The window frames are originals, instead of replacing them we polished them with purple metal oil polish and it worked fine for us.
SHOWER AND TOILET ~ What better way to live the beach bum lifestyle than to install an outdoor shower! We have installed a hot water tank that pumps water through to a regular shower head. We have bought shower curtains and a step so we are not showering right on ground and have some privacy. We plan on mostly using this shower when we are on long stretches of driving without any camp grounds. Now for the toilet, I wish I didn’t have to share this but it’s truly essential in our travels. For some reason I just assumed I’ll be fine without a toilet forgetting the cold temperatures at night and the dangers of squatting in the northern territories (snakes, spiders, crocodiles!). Proudly sponsored by Sams Grandparents, we were gifted a “thunder down under” toilet. By toilet I mean bucket, just so you know. It has a toilet seat at least, but while it’s not the most glamorous in the world, it’s worked great as a last resort on the road. Tip: don’t be shy, this will only bring you and your partner closer (we hope anyway).
ROADWORTHY MAINTENANCE~ This is the most important part of restoring a van, making sure it is roadworthy and safe to tow. We rotated the axel to give the caravan more ground clearance and bring it level with the Ute that it was getting towed with. We also put new wheel bearings in, reshoed and retentioned the brakes, replaced the water storage tank, replaced most of the windows with Perspex sheets and added some hinges so it would open and close properly, replaced the tail lights and replaced the towel rack.
Thank you for reading, I hope this information was useful! If anyone has any further questions please send us a message on the Contact page. This was our first time doing a project like this and we have learnt lots along the way, especially now that we are on the road. I will update any changes we have made to the van as we go!
Syd n Sam x
